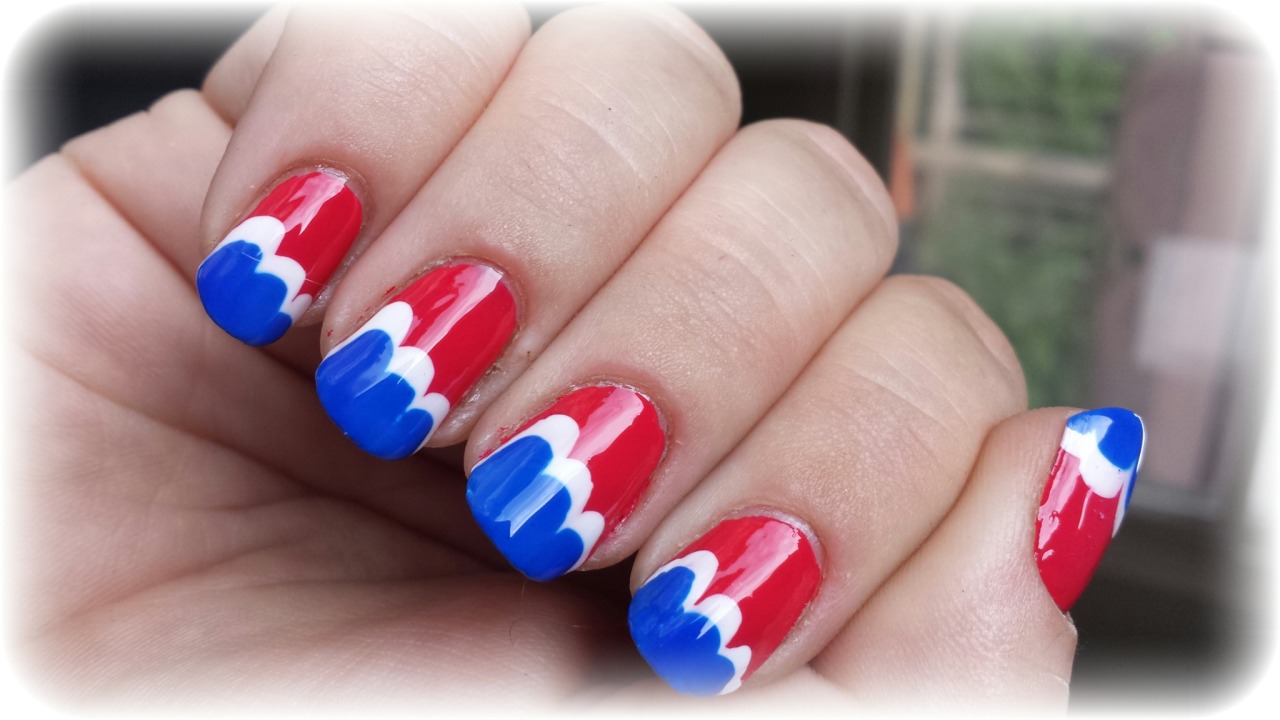
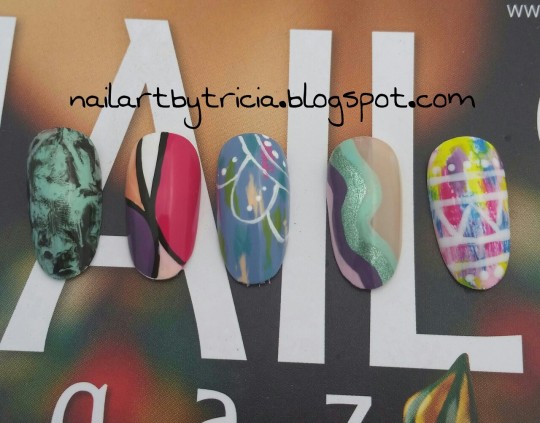
Even though you can get almost any publication online, there is something that excites me about opening the mailbox and finding Nails Magazine. Here are recreations of some of my favorites from the May 2015 issue:
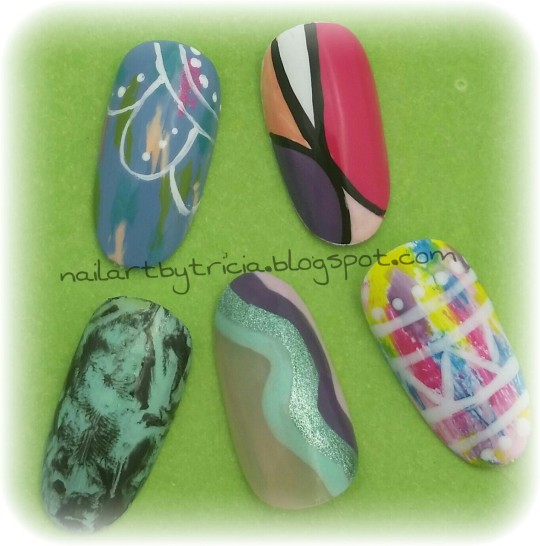
Working left to right: nails 1, 2, and 4 were pictured in the Hawaii Collection by OPI advertisement. #2 actually have a step-by-step tutorial in the OPI insert within the mag. #3 is another step-by-step demo from Biosculpture gel (I used regular polish) on page 56. My last nail is a Neon Tribal Nail Art tutorial that was contributed by Mia Rubie (@superflynails). I love this design because it looks a bit complicated, but it's actually a lot easier than you might think.
Again, I am not going to clutter up this post with a listing of all the polishes I used, but if you are curious, please ask and I will be happy to answer! :)
Showing posts with label #nailpolish. Show all posts
Wednesday, May 6, 2015
Monday, April 6, 2015
Hello Venique
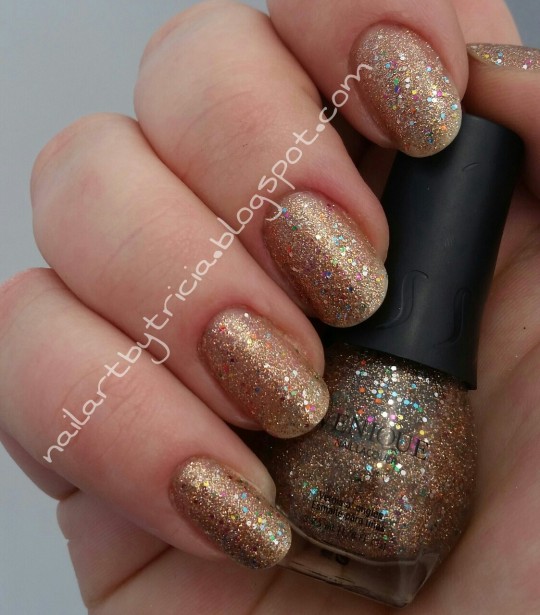
As a beauty school student, I am now officially allowed to shop at cool places like Cosmo Prof. On Saturday, I took my little student license and got my "card" from the Cosmo Prof store in Hagerstown, MD. The cashier was super friendly and nice. Once I got my paperwork out of the way, I felt like she had released me into a candy store of sorts -- I didn't know where to start! Everything at Cosmo Prof is basically wholesale-priced for cosmetology professionals, meaning everything is SO MUCH CHEAPER than your typical retail venue. I didn't go too crazy this time (as I was supposed to be Easter shopping), but I did come across a brand of polish that was new to me -- Venique. Have you heard of it? I decided to give it a try, and got a cute little bottle with no name on it of course.
I used 3 coats to achieve full coverage, but this could easily be used as a topper. I can only describe this as a rose-gold colored glitter, with larger pieces of glitters that are multi-colored. I love the look of glitter but hate the process of getting it off my nails, so I don't typically gravitate toward these type of polishes, but this one kept catching my eye. I actually liked this enough to wear it on its own for a few days, but I feel the urge to stamp coming on.
Have you tried Venique? What was your opinion? So far I think I will definitely be trying more of this brand -- another excuse to go back to Cosmo Prof :)
I used 3 coats to achieve full coverage, but this could easily be used as a topper. I can only describe this as a rose-gold colored glitter, with larger pieces of glitters that are multi-colored. I love the look of glitter but hate the process of getting it off my nails, so I don't typically gravitate toward these type of polishes, but this one kept catching my eye. I actually liked this enough to wear it on its own for a few days, but I feel the urge to stamp coming on.
Have you tried Venique? What was your opinion? So far I think I will definitely be trying more of this brand -- another excuse to go back to Cosmo Prof :)
Sunday, March 29, 2015
It's a Spring Thing
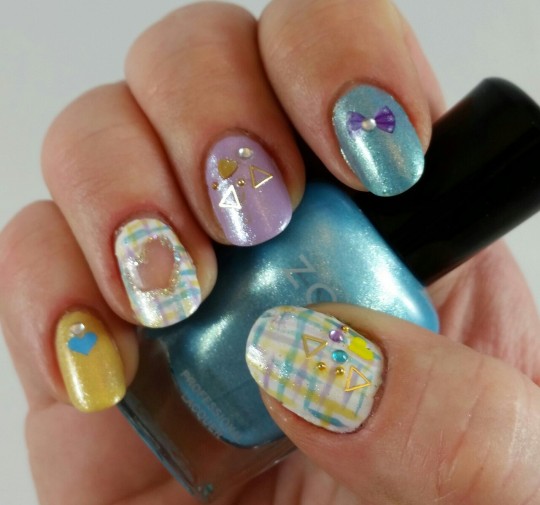
I found an artist on Instagram and Facebook called Muses Gel, out of Taiwan. Her style inspired today's Easter/Spring/Pastel mani.
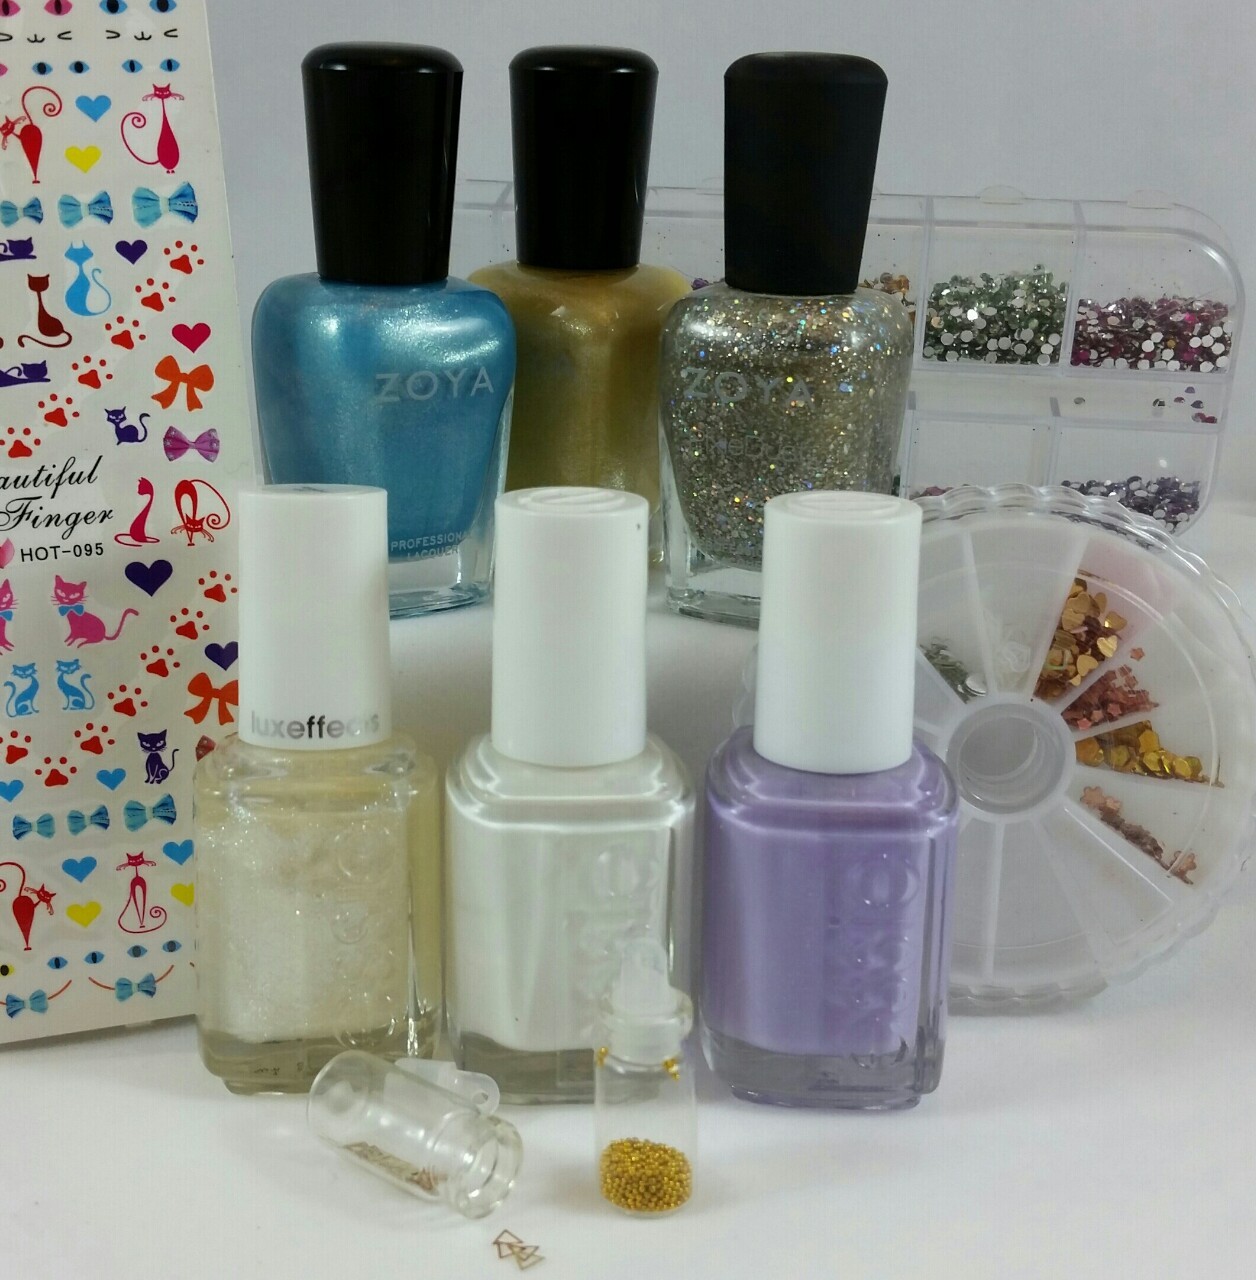
I used a crap-ton of different products to achieve this look (see the pic below!). Polishes are Zoya "Piaf" (yellow), Zoya "Rebel" (blue), Essie "Full Steam Ahead" (lilac), and Essie "Blanc" (white). I added a layer of Essie Luxe Effects "Pure Pearfection" to give the lilac color a little more of a shimmer - similar to the Zoyas. Zoya "Cosmo" outlines the heart on the ring finger. I added some water decals from the Born Pretty Store, some gold heart nail spangles, goldtone metal confetti triangles from Bundle Monster, rhinestones and caviar beads. I used the same tutorial that I used for my Tweed Nails on the ring finger and thumb.
I just got a new light box, and while I still have a lot to learn about it, I really like it! I think it will take a little bit of playing around to find the perfect angle.
I used a crap-ton of different products to achieve this look (see the pic below!). Polishes are Zoya "Piaf" (yellow), Zoya "Rebel" (blue), Essie "Full Steam Ahead" (lilac), and Essie "Blanc" (white). I added a layer of Essie Luxe Effects "Pure Pearfection" to give the lilac color a little more of a shimmer - similar to the Zoyas. Zoya "Cosmo" outlines the heart on the ring finger. I added some water decals from the Born Pretty Store, some gold heart nail spangles, goldtone metal confetti triangles from Bundle Monster, rhinestones and caviar beads. I used the same tutorial that I used for my Tweed Nails on the ring finger and thumb.
I just got a new light box, and while I still have a lot to learn about it, I really like it! I think it will take a little bit of playing around to find the perfect angle.
Friday, March 20, 2015
Nails Mag Recreations
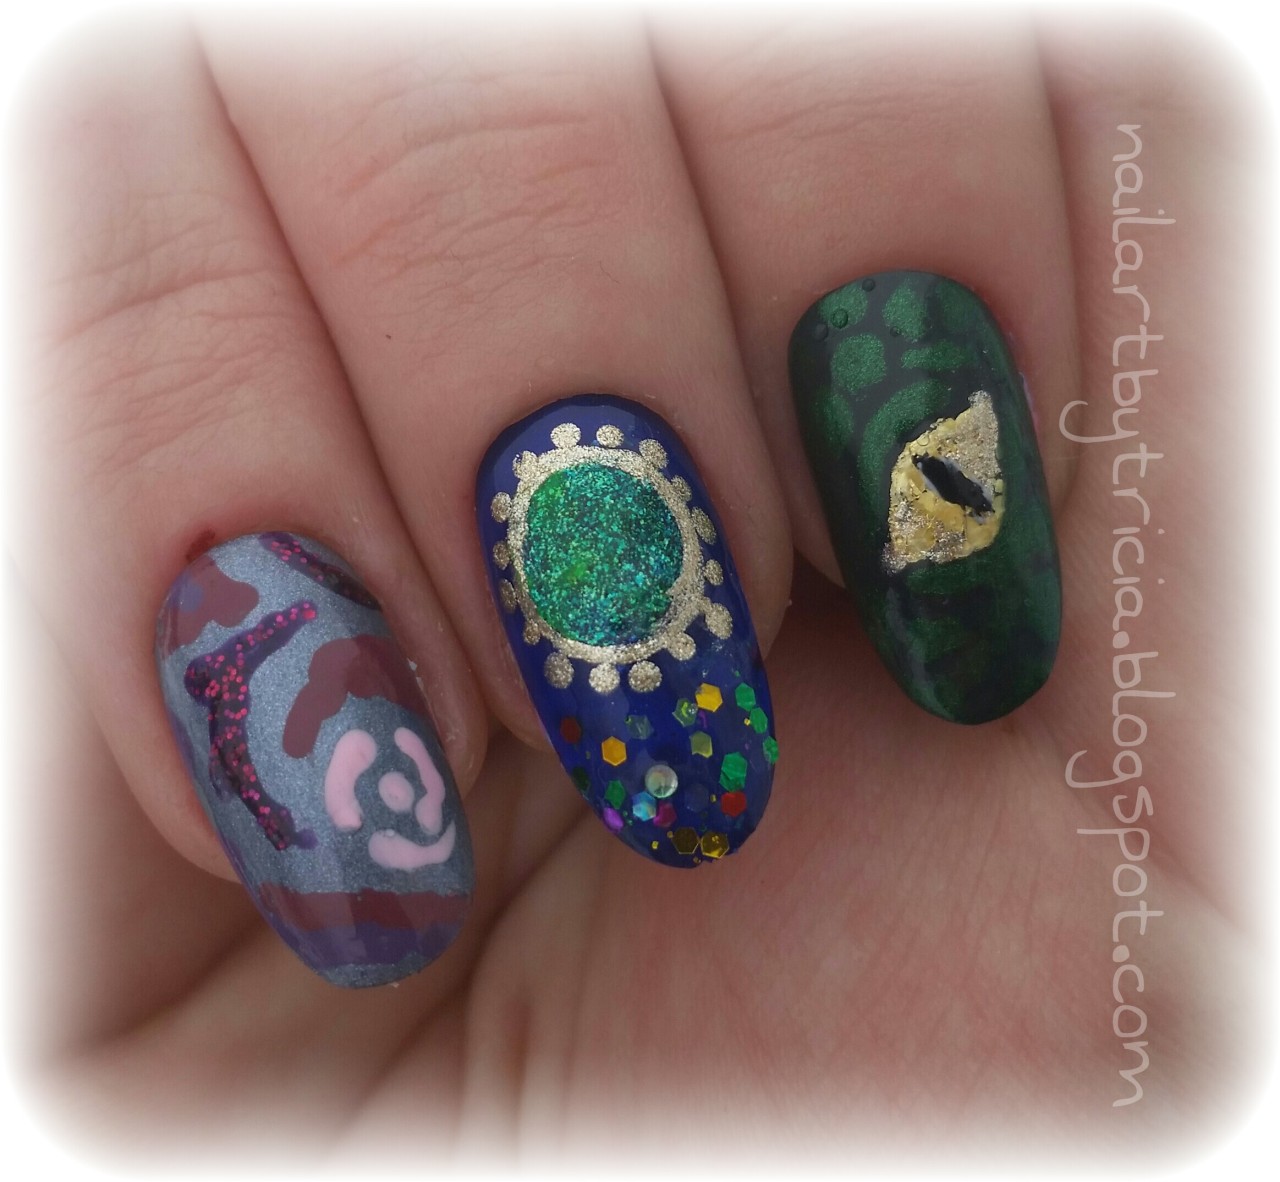
I always look forward to my nail mags - even though print media is going out of style, it's still nice to turn those pages every once in a while. The March 2015 edition of Nails Magazine was no exception. In fact, I loved a few of the designs so much that I immediately felt the urge to re-create them!
First up is my version from CND Vinylux ad - I used a no-name Sally Girl gray as my base. For the floral/abstract design, I free-handed with Zoya "Noir" along with 3 shades from The New Black's pink ombre set. This was a very easy design to do, and can be accomplished easily with multipe varieties of colors!
The Snake Eye Tutorial on page 52 was submitted to the mag from Anna Mally of Las Vegas. I used Wet N Wild "SaGreena the Teenage Witch" as my base, and another TNB green (this time from the Runway collection) for the scales. The eyes were done with "Gold Dots" nail foil, and then detailed with black and white stripers. I loved this design so much, I had to create a full design, but that is a post for another day :) The eye itself was a little challenging, but overall the design was not too terribly complicated or hard.
My last reproduction is based off the page 62 tutorial, entitled Royal Jeweled Nails with Gelish Cinderella Collection. I used Whet "Facetious" for my base, added glitter and then created a circle with "Jungle Tides" nail foil. I painted around my green circle with a gold striper, and added the tiny dots with my trusty dotting tool. Unfortunately, the green foil didn't give me the coverage I wanted/needed, so I covered it with a gorgeous sparkly "Glee" green from Jesse's Girl. Again, not too difficult - I think I just need more practice with the foils.
First up is my version from CND Vinylux ad - I used a no-name Sally Girl gray as my base. For the floral/abstract design, I free-handed with Zoya "Noir" along with 3 shades from The New Black's pink ombre set. This was a very easy design to do, and can be accomplished easily with multipe varieties of colors!
The Snake Eye Tutorial on page 52 was submitted to the mag from Anna Mally of Las Vegas. I used Wet N Wild "SaGreena the Teenage Witch" as my base, and another TNB green (this time from the Runway collection) for the scales. The eyes were done with "Gold Dots" nail foil, and then detailed with black and white stripers. I loved this design so much, I had to create a full design, but that is a post for another day :) The eye itself was a little challenging, but overall the design was not too terribly complicated or hard.
My last reproduction is based off the page 62 tutorial, entitled Royal Jeweled Nails with Gelish Cinderella Collection. I used Whet "Facetious" for my base, added glitter and then created a circle with "Jungle Tides" nail foil. I painted around my green circle with a gold striper, and added the tiny dots with my trusty dotting tool. Unfortunately, the green foil didn't give me the coverage I wanted/needed, so I covered it with a gorgeous sparkly "Glee" green from Jesse's Girl. Again, not too difficult - I think I just need more practice with the foils.
Saturday, February 28, 2015
Purple Flowers
Today's mani is inspired by this post by So Nailicious.
I used two of the purples from The New Black's "Haze" Ombre Set on this design. The negative space stripes were done using nail striping tape, and I used the watercolor technique for the flowers. I had originally placed three small white dots in the middle of the flowers, but I didn't really like how they looked, so I used the watercolor technique again to blend them into the purple and added tiny black dots. This design wasn't too difficult, and I have been getting tons of compliments all day :)
*Nails are pictured with my new awesome Pitcher Plant!
I used two of the purples from The New Black's "Haze" Ombre Set on this design. The negative space stripes were done using nail striping tape, and I used the watercolor technique for the flowers. I had originally placed three small white dots in the middle of the flowers, but I didn't really like how they looked, so I used the watercolor technique again to blend them into the purple and added tiny black dots. This design wasn't too difficult, and I have been getting tons of compliments all day :)
*Nails are pictured with my new awesome Pitcher Plant!
Wednesday, January 21, 2015
Golden Snowflakes
I do a snowy design on my nails, and it snows :( I guess I need to do some kind of spring/summer mani next.
Anywho, in case you couldn't tell, I'm not a big fan of snow, Or cold. Nonetheless, I picked up a few gorgeous Zoya polishes on sale at Ulta ($1.97 for Pixie Dust? Yes please!) and thought that "Rebel" and "Nori" would look awesome together for some type of winter design. This is what I came up with :)
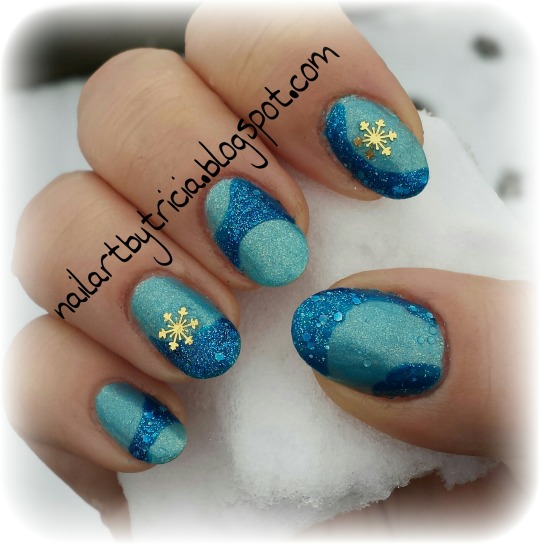
The base is Zoya's "Rebel," which is a sky blue metallic with a silver shimmer. I added "Nori" in a random, abstract pattern and a few gold snowflakes. It's a pretty simplistic mani, but I am pleased with how it turned out.
Anywho, in case you couldn't tell, I'm not a big fan of snow, Or cold. Nonetheless, I picked up a few gorgeous Zoya polishes on sale at Ulta ($1.97 for Pixie Dust? Yes please!) and thought that "Rebel" and "Nori" would look awesome together for some type of winter design. This is what I came up with :)
The base is Zoya's "Rebel," which is a sky blue metallic with a silver shimmer. I added "Nori" in a random, abstract pattern and a few gold snowflakes. It's a pretty simplistic mani, but I am pleased with how it turned out.
Friday, January 16, 2015
Born Pretty #BP-24
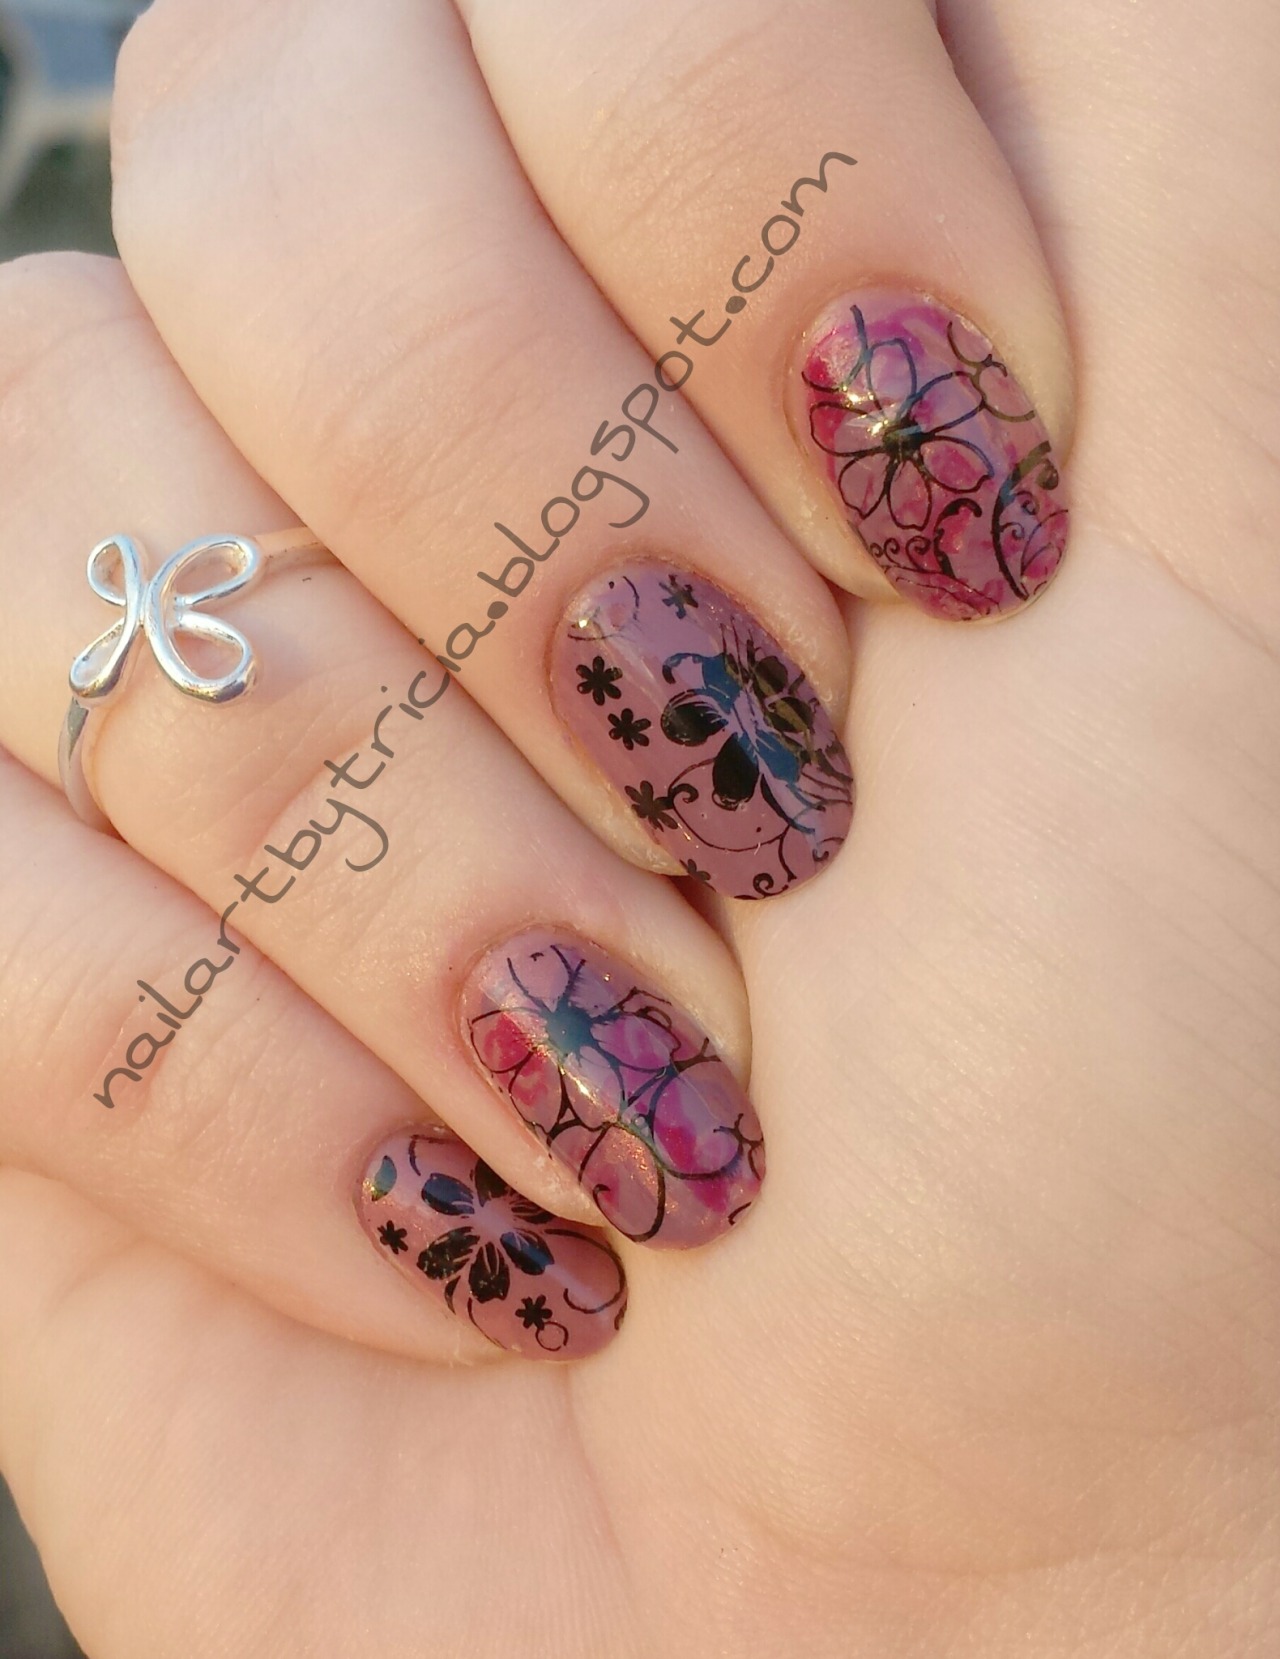
I am very pleased with the new Born Pretty Store plates! For this mani, I used plate #BP-24. I really loved the rambling flower pattern on the plate, but I was a little worried how the finer lines would pick up - but they were clean and crisp! I did a little happy butt jiggle in my seat :) I used Zoya's "Odette," "Paloma" and "Charity" to create a dry water marble on the first and ring fingers, and the remaining digits are each in one of the three shades (Pinky is "Charity," middle finger is "Odette." etc). I have a little bit of tipwear going on, but I also did a lot of cleaning :/ My bad.
Don't forget that you can use code TTHEX31 to get 10% off a Born Pretty Store purchase!
Tuesday, January 13, 2015
Bad Romance
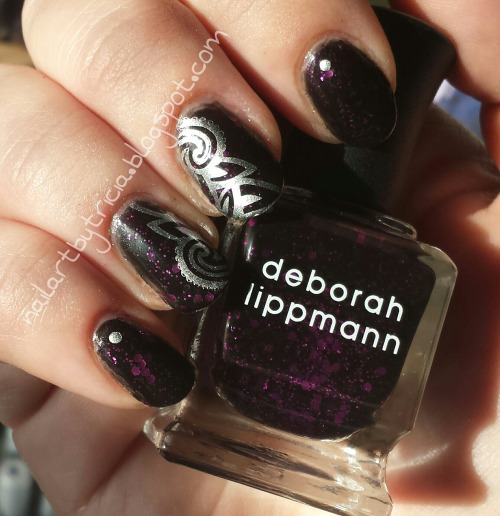
Today I am using my Deborah Lippmann polish for the first time. This is "Bad Romance," which is a black jelly polish, loaded with purple glitters. I applied 3 coats, and then stamped Sally Hansen Insta Dri in "Silver Sweep" and one of the new plates from the Born Pretty Store, #BP-08.
While the color and formula itself is pleasing, I wasn't very happy that I had tip wear after less than 24 hours (with 2 coats of Seche Vite applied). Luckily, this bottle of DL was on sale at Ulta - had I paid retail price ($19), I wouldn't be too happy. Will I ever try DL again? Maybe, but only if it's on sale!
Saturday, January 10, 2015
Keep Calm and Chive On
A lot of people, including myself, find nail art inspiration on social media - Facebook, Pinterest, Instagram, and so on. I was feeling particularly uninspired, so I decided to cruise one of my favorite sites, the Chive, in hopes of finding something that would turn on the light bulb in my head. Then it hit me - why not do Chive nails?! So here we are. The Chive's "color" is green, so I went with a girly shade of green with a hint of glimmer by Emerald & Ash called "Stubble Jumper." This was a limited edition polish that I won in a giveaway, numbered bottle 4 of 5. :) For my fingers I stamped them "KCCO" - which is short for the Chive's Logo, "Keep Calm and Chive On." For my thumbs, I stamped a crown (again, part of the KCCO logo), and a peace sign on the other.
If you have never heard of the Chive, or you have heard of it but never visited, go now! It is amusing, funny, interesting, and sometimes even educational.
Stamping plates used:
Bundle Monster's BM08 for the crown
Keep Calm and Chive On!
Monday, November 17, 2014
Inspired by: @alisnailart
Today's mani is inspired by an amazing artist I came across on Instagram, @alisnailart. For this design, I used Funky Fingers "Bizerk Turq" for the base, and then sponged on Funky Fingers in "220 Volts" on half the nail. I sponged on some of China Glaze "Travel in Colour" for some shimmer, and used a striping brush with the Funky Fingers colors to add the finishing touches. I was very pleased with the results, and I cannot wait to try some of her other designs. :)
Sunday, November 9, 2014
It's my Birthday!
Tuesday, November 4, 2014
Tweed Nails inspired by Kawaii Claws
I was cruising Etsy for inspiration and came across KawaiiClaws.com. This chick is amazing! I pinned a couple of her manis to recreate. Today I used Essie "Play Date" for the base, and Essie "Full Steam Ahead" with Wet N Wild (sorry no name) to create the tweed look. I used a great tutorial from Valiantly Varnished for the tweed design, and put on the finishing touches with some rhinestones, pearls, and metal studs. :)
Tuesday, October 28, 2014
No Tricks, Just Treats
I wanted the houses to appear to have lights on, so I used the decal method. The house on the ring finger is from BM224, and the middle finger is from BM305. For the moon behind the house on the ring finger, I made another decal. I used the Christmas bulb from BM225, using only the circular shape of the bulb. I used a yellow from The New Black's Runway collection, and then added Funky Fingers "Lil Miss Sunshine" to give the moon some depth. I really like how the moon turned out :)
The bats are from Bundle Monster stamps #BM13. I used a portion of a stamp from #BM224 on my pinky and thumb that looks like branches. I used #BM13 again to create the spider and web on my thumb.
Finally, I was pleasantly surprised when I went to bed last night - my nails were glowing!!! I am going to try to get a pic :)
Labels:
#BM13,
#BM224,
#BM305,
#BundleMonster,
#FunkyFingers,
#halloween,
#halloweennailart,
#IndigoBananas,
#nailart,
#nailartdesign,
#naildecal,
#nailpolish,
#nailstamp,
#nailstamping,
#RA105,
#TheNewBlack
Sunday, October 19, 2014
This Sh*t is Bananas!
I was blessed to win a giveaway in which I received 3 small Indigo Bananas polishes of my choice, along with a cuticle balm. One of my three pics was Perfect Night - a purple jelly with blue flakies. This is flippin' gorgeous!!!! I have gotten more complements on this polish than any other I have worn. I added some rhinestones, pearls and caviar beads, and stamped a couple nails with plate BM502 from the Sunkissed Bundle Monster collection. I just love the blue and purple together. I apologize that my picture sucks (I am working on that, I swear!) - you can't tell how amazing this color is.
Labels:
#BM502,
#BundleMonster,
#ilovenailpolish,
#IndigoBananas,
#nailart,
#nailartaddict,
#nailartclub,
#nailartdesign,
#nailartjunkie,
#nailartlove,
#nailpolish,
#nailsaddict,
#nailstamp,
#nailstamping
Wednesday, October 15, 2014
October is Breast Cancer Awareness Month
I had a more detailed mani in mind, but every time I would sit down to work on it, something would go wrong -- one time a stink bug landed on my pinky and drug his nasty little legs through my wet polish. After 3 tries, I gave up and decided to go with something simple. I painted the base with Nicole by OPI in "Still into Pink." This is a matte polish, and I wanted to love it, but I needed something a little more, so I added a thin coat of Wet N Wild "Break the Ice" to add just a little shimmer. I popped on some rhinestones for the bow, added a few hearts, and there you have it!
Monday, September 29, 2014
Today's 5Below Haul!
If you don’t have a 5Below store near you, I am very sorry. I LOVE this store. I cannot leave without nail polish. Along with a bunch of bow cabochons and nail sequins, I grabbed up 4 bottles. The Fresh Paint is called “Winning” - it’s a nice earthy green color. I can definitely see using that for nail art. Next up (wer’e going left to right, here!) is Funky Fingers “Dia De Muertos.” This cool blue jelly is chock-full of pink and blue glitter, and it even glows in the dark. Yay! FF “Fireworks” is a polish I have been eyeing. I will definitely use that next 4th of July. Fireworks is a clear polish with red, white and blue glitters, in a variety of sizes. Very cute topper. Last is FF “Varsity Blue.” This is another clear topper with black, blue and white glitter in 2 different sizes. I have oh so many mani ideas for these!
Labels:
#5Below,
#FreshPaint,
#FunkyFingers,
#FunkyFingerspolish,
#glowinthedarkpolish,
#ilovenailart,
#nailart,
#nailartclub,
#nailartjunkie,
#nailartlove,
#nailpolish,
#nailsaddict,
#nailspolish
Wednesday, September 24, 2014
Down the Rabbit Hole
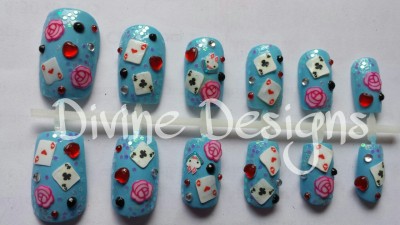
A set of nails I did for Listia, on an Alice in Wonderland theme. These were lots of fun to do!
I used rabbit, rose and playing card fimo, as well as black, white and red rhinestones. I also placed small pieces of iridescent glitter on each nail.
Monday, September 22, 2014
Saturday, September 20, 2014
Inspired by Allure Nail
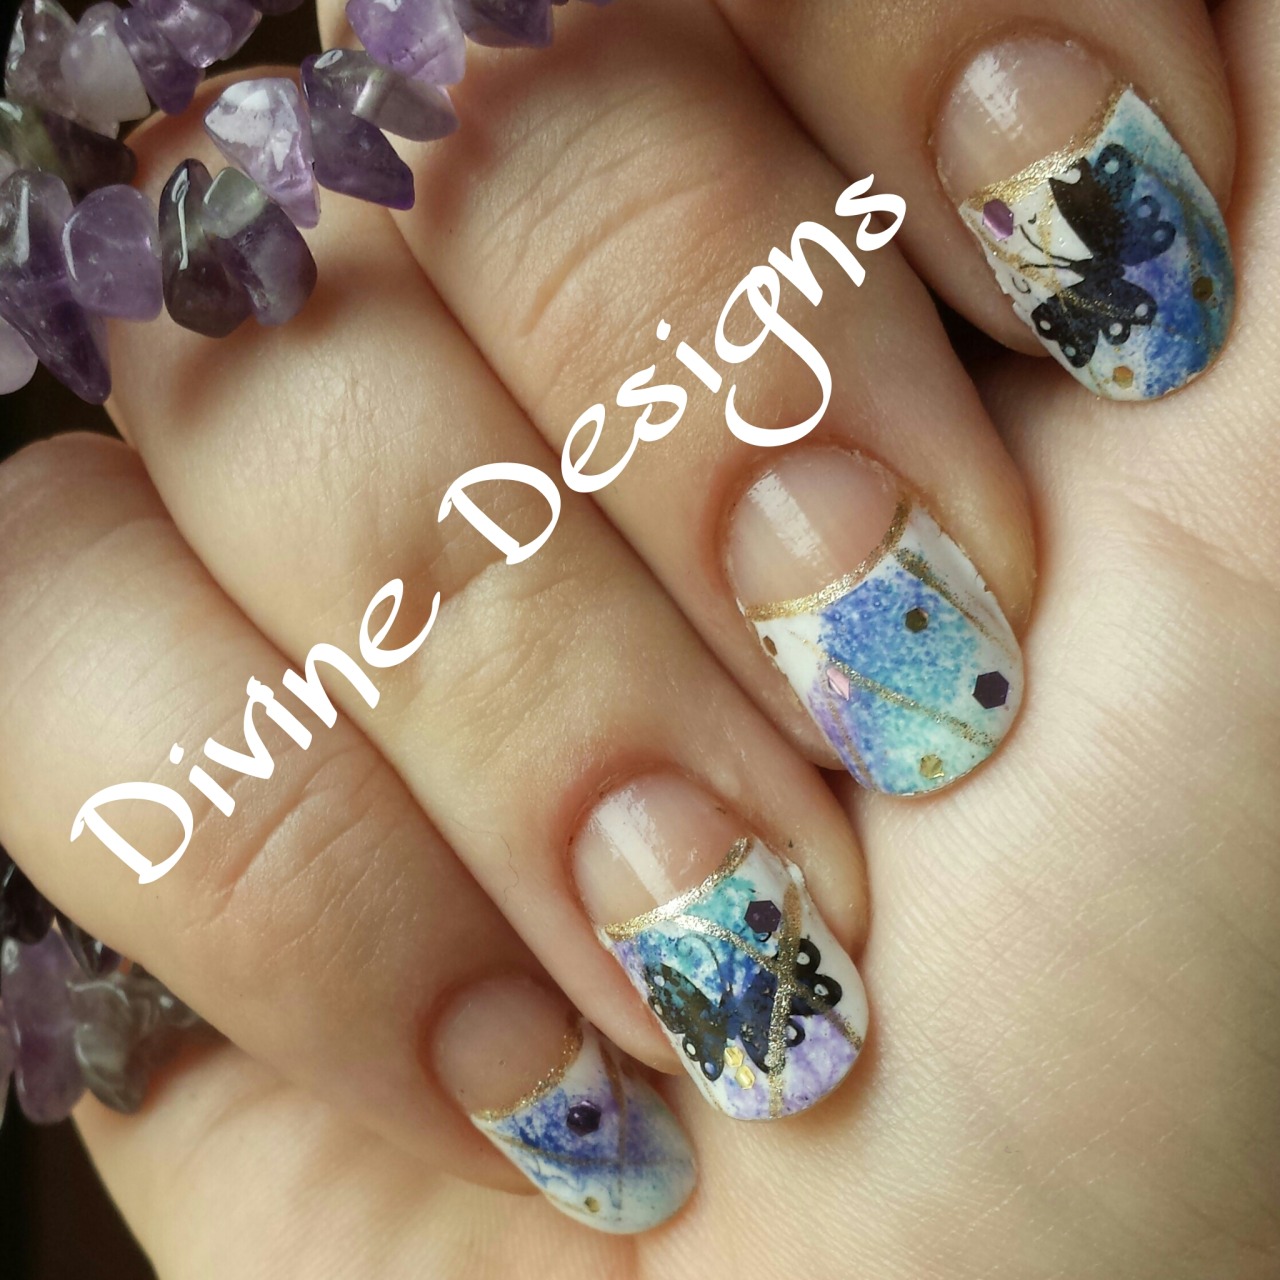
I am obsessed with nail art on Pinterest. You can see my collection of awesomeness here. Anyway, I found this amazing design which inspired me to do the above mani. It was originally done by Allure Nail - see the original post here. I wasn’t sure I was going to like the negative half-moons, but I feel like it makes my nails look longer. I used Essie’s Blanc as my white base, then added a coat of WnW’s Break the Ice to give just a little bit of shimmer. Then I sponged some green, blue and purple randomly. I edged the half-moons with gold and added a few gold lines. The butterflies were stamped with Pueen plate #PUEEN39. A little gold and purple glitter, and Viola! Kickass mani. Love it!
Thursday, September 18, 2014
Coconut up your …what?!?!
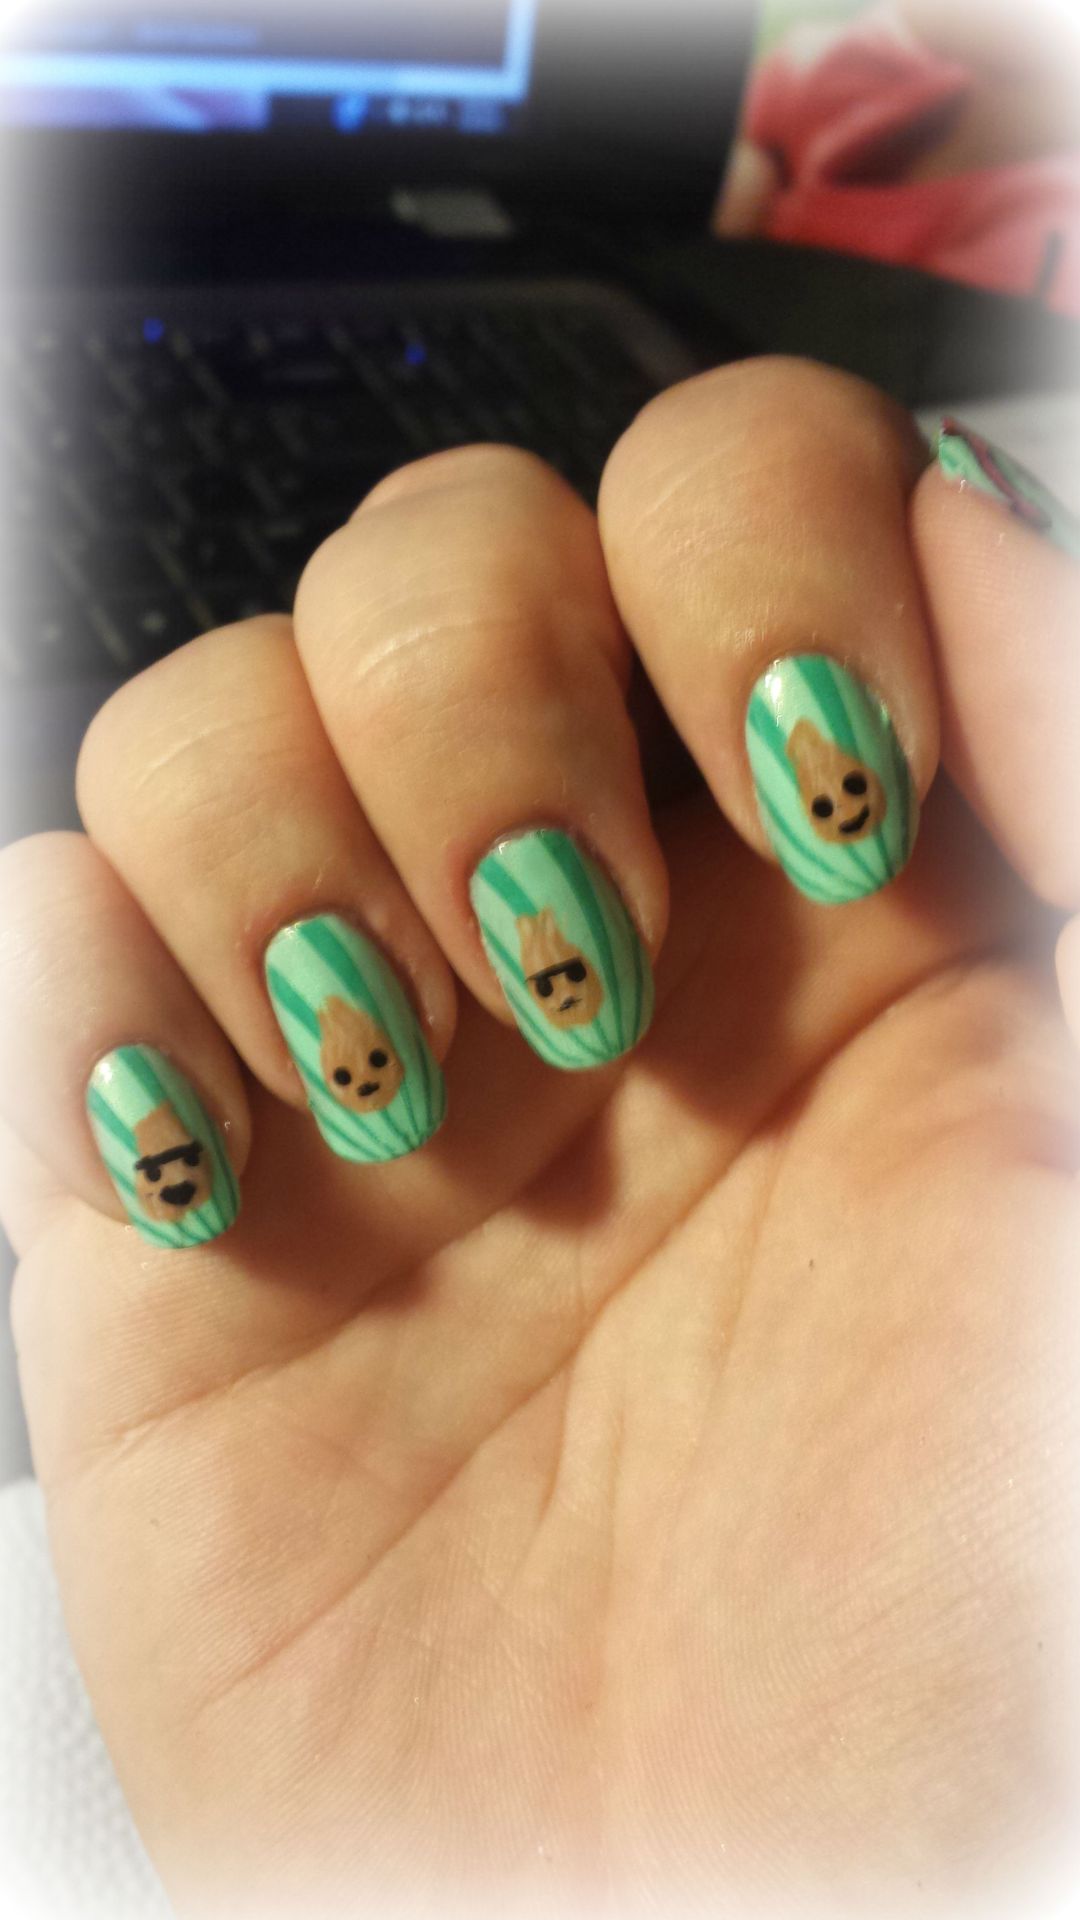
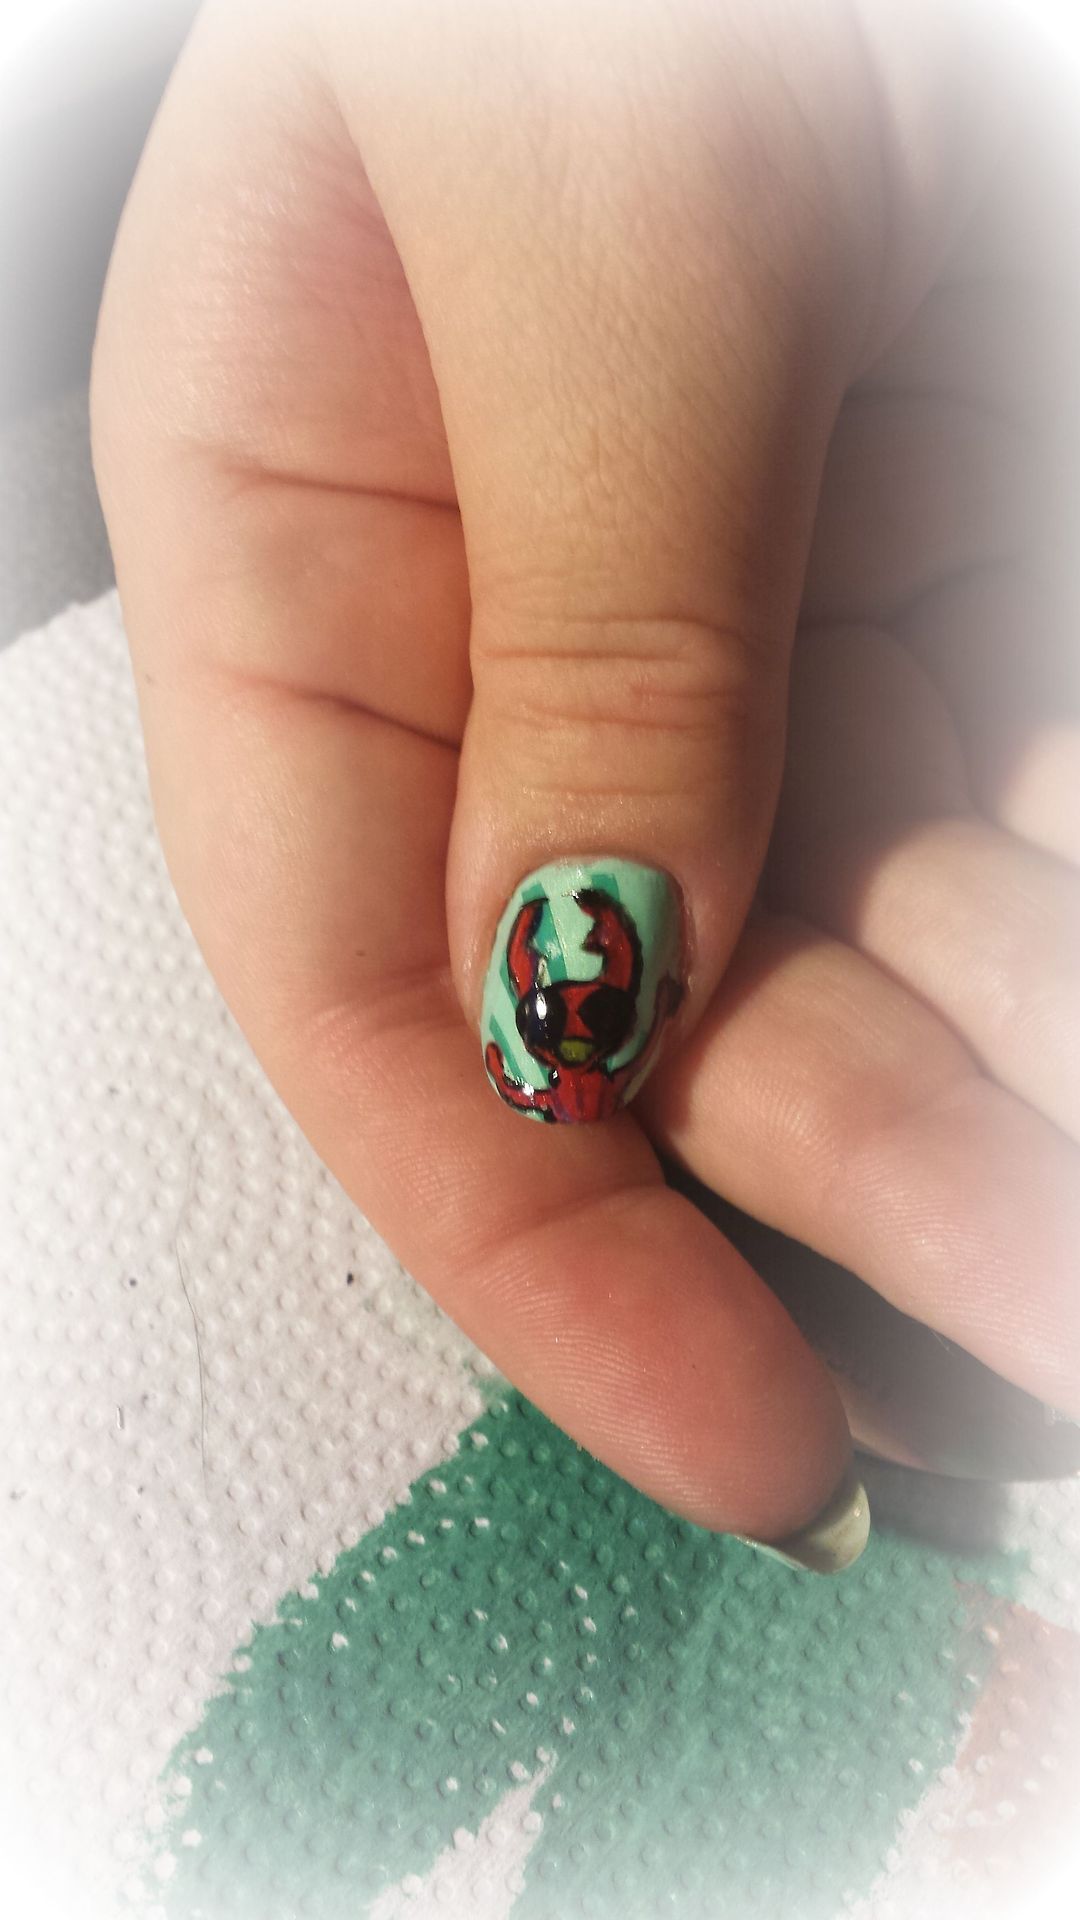
If you want to waste 3 minutes of your life, you can watch this video. It really makes me think about how entertainment has evolved. Otherwise, I will give you the short version: a little red alien/bug thing sits on a coconut, and they make a song about it. Strange. Stupid. Waste of brain cells. I jokingly said “I should put that on my nails!” and my son said “no! you are not allowed!” - - challenge accepted. Rule #1: NEVER tell a woman what she cannot do.
This mani was done quickly, I will admit, with less effort than I normally give. Whatever. I used Funky Fingers "Mrs. Mint" for the base, and stamped the lines with Sally Hansen InstaDri in "Mint Sprint," BM plate #BM301. I free-handed the coconuts with SH "Terracotta", and added some light ivory wisps. I did the little buggy guy with my Nail Candy nail pens.
When I showed my nails to my son, he just shook his head and walked away. Score 1 for mom. :)
Subscribe to:
Posts (Atom)