Showing posts with label #WetNWild. Show all posts

Sunday, April 5, 2015

Happy Easter

Happy Easter Peeps!
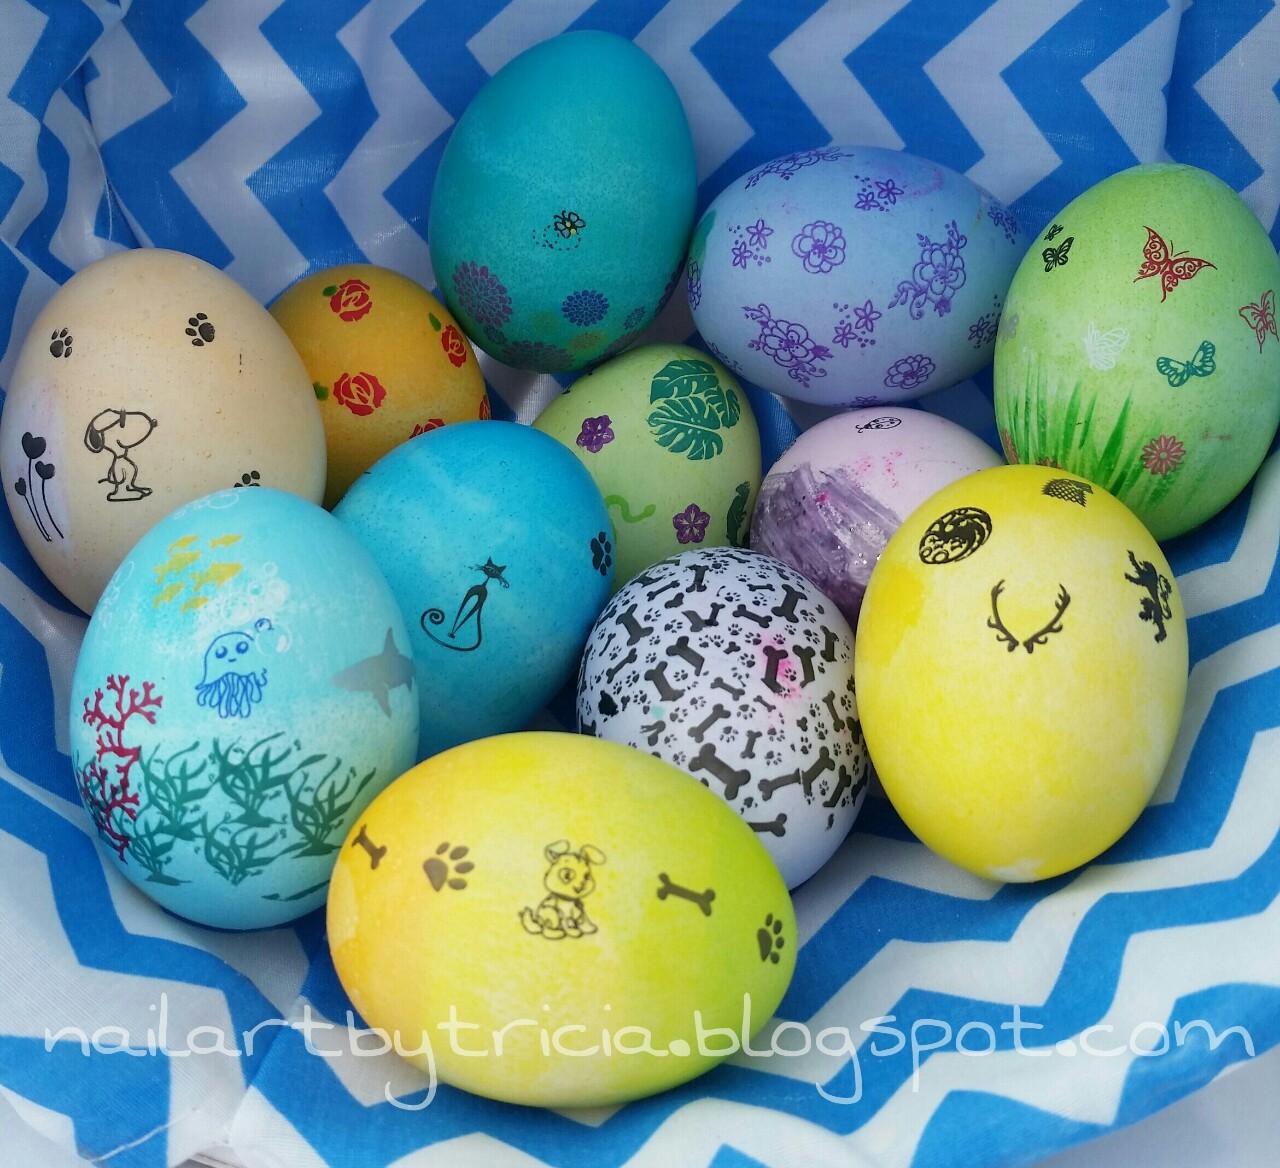
I was dying eggs with my 5-yr old daughter last night, and she wanted ladybugs (her favorite) on one of her eggs. I got the bright idea to use nail stamps and BAM! it hit me - this is awesome! I'm going to do all the eggs with stamps! Thankfully we only did 12 eggs in total.
Our fabulous egg-venture started with a pink egg, some Wet N Wild black polish, and Moyou's Princess Collection #3 stamping plate.

Saturday, March 21, 2015

Nails Mag - Snake Eyes

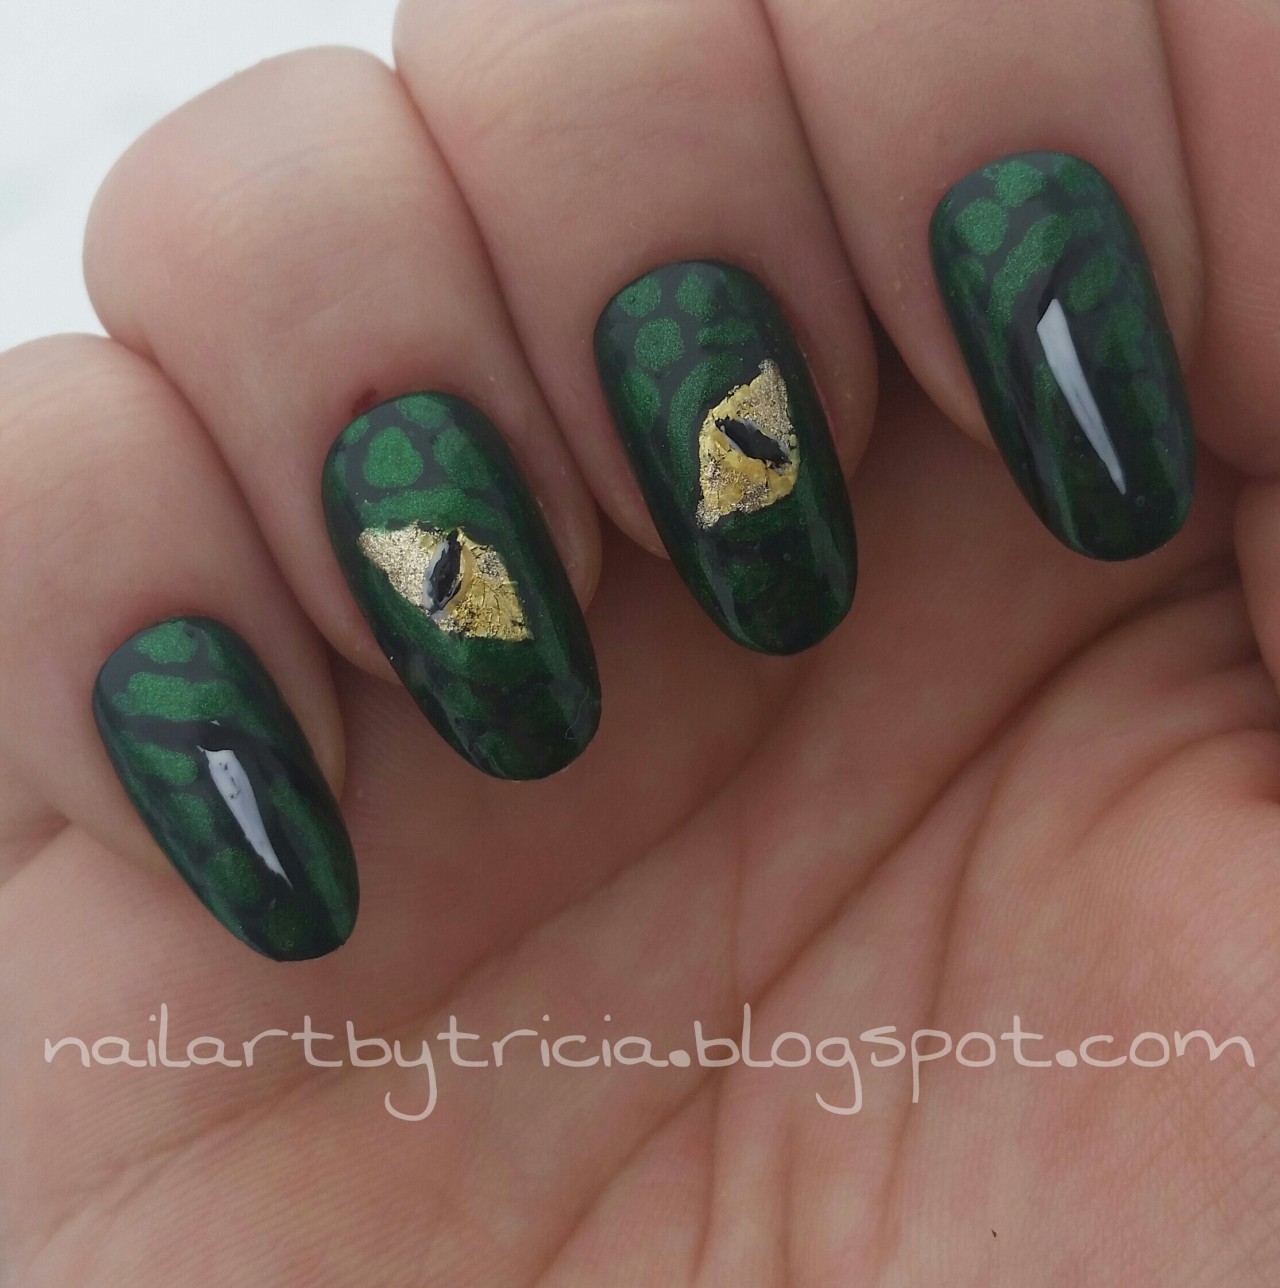
I liked the Snake Eye so much from my Nails Mag recreations that I decided to elaborate on the idea.
My second eye didn't turn out as well as the first (the right one). I added fangs and a smile line with black and white stripers. This will take some more practice to perfect, but I am pleased with the results.

Polish used:  Wet N Wild "SaGreena the Teenage Witch"
                             The New Black - green from the Runway collection
                              LA Colors stripers in black and white
I also used "Gold Dots" nail foil for the eyes. 

Tutorial submitted to Nails Mag from  Anna Mally of Las Vegas. 


Friday, March 20, 2015

Nails Mag Recreations

I always look forward to my nail mags -  even though print media is going out of style, it's still nice to turn those pages every once in a while. The March 2015 edition of Nails Magazine was no exception. In fact, I loved a few of the designs so much that I immediately felt the urge to re-create them!

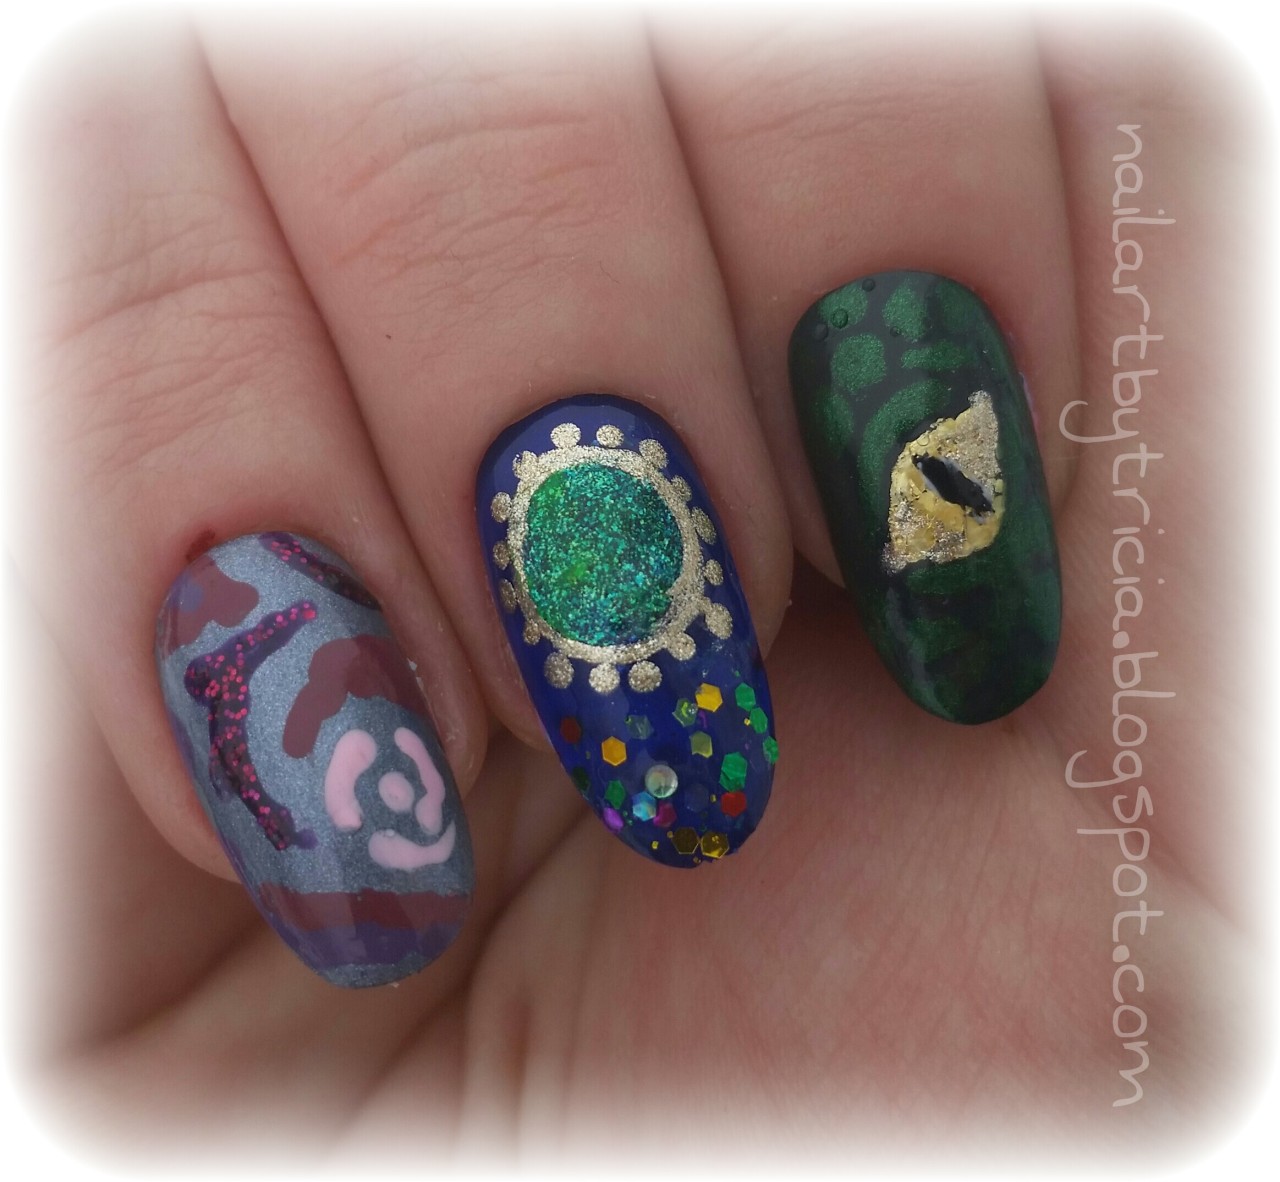
First up is my version from CND Vinylux ad - I used a no-name Sally Girl gray as my base. For the floral/abstract design, I free-handed with Zoya "Noir" along with 3 shades from The New Black's pink ombre set. This was a very easy design to do, and can be accomplished easily with multipe varieties of colors!

The Snake Eye Tutorial on page 52 was submitted to the mag from Anna Mally of Las Vegas. I used Wet N Wild "SaGreena the Teenage Witch" as my base, and another TNB green (this time from the Runway collection) for the scales. The eyes were done with "Gold Dots" nail foil, and then detailed with black and white stripers. I loved this design so much, I had to create a full design, but that is a post for another day :)  The eye itself was a little challenging, but overall the design was not too terribly complicated or hard.

My last reproduction is based off the page 62 tutorial, entitled Royal Jeweled Nails with Gelish Cinderella Collection. I used Whet "Facetious" for my base, added glitter and then created a circle with "Jungle Tides" nail foil. I painted around my green circle with a gold striper, and added the tiny dots with my trusty dotting tool. Unfortunately, the green foil didn't give me the coverage I wanted/needed, so I covered it with a gorgeous sparkly "Glee" green from Jesse's Girl.  Again, not too difficult - I think I just need more practice with the foils.

Friday, March 6, 2015

Dear Spring, Please Come Soon!

As I sit here at my computer, I glance out the window. All I can see is snow. Almost a foot of snow. PLEASE. STOP. I feel like Winter is saying "my time is almost up, so let me s#it out a ton of the white stuff while I can!"  Bad Winter. Stop now.
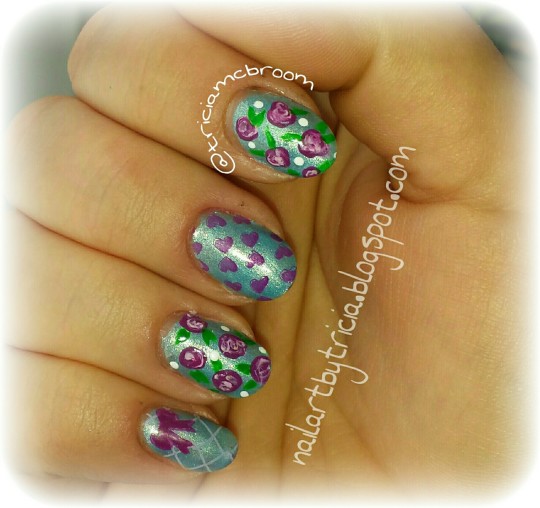
Today's mani is my beckon to spring - I love you and wish you would come back soon!
My base isi Zoya "Rebel" - this is a metallic sky blue with a subtle silver shimmer. Great coverage - which is one of the reasons I love Zoya.
 I did a combo of freehand painting and stamping on this hand job. For the roses, I used a combo of WetNWild  "Through the Grapevine" and one of the pinks from The New Black pink ombre kit. I used a green LA Colors striper to add the green leaves, and finally Funky Fingers "Gesso" for the white dots. I stamped the middle finger with the same WNW "Through the Grapevine" and Pueen stamp #PUEEN29.  For the pinky, I did a double stamping from Gals Cosmetics plate #GA7.

Today I will be offering free ass-kickings to anyone seen doing any snow dances in my presence.

Thursday, January 29, 2015

Cat Hair Nails


I’ve gotten pretty good at recreating other people’s work, but I want to be more than just a copycat artist.  This year I have decided to focus on trying to do more of my own original designs. I wanted to do something completely out of the box, but wasn’t exactly sure what. I follow a gazillion talented bloggers, but one that sticks out in my mind for originality is PiggieLuv – particularly her amazing manis done with flocking powder, cork, and otherout-of-the-ordinary mediums.  One day it hit me – I want to do a mani with cat hair. Yes, real cat hair.

I have cats. Plural. All rescues. They love to lay on my stuff, and get their hair everywhere. They puke up hairballs on my desk. They drive me insane sometimes, but I wouldn’t trade them for the world. No cats were harmed in the making of this mani. Three of them purred profusely when I “borrowed” some of their hair. 

After I painted each nail with the background color, I began the process of hair collection. First up was Smeagle, my Sphynx. He is what breeders refer to as a “peach fuzz” Sphynx, as opposed to a “rubber bald’”  -  ie, he has a little bit of hair. All I had to do was give him a good rubdown, and my hand was covered in his fuzzies. The base skin tone color is two coats of  KleanColor “Sheer Pastel Nude” with a coat of “Sheer Pastel Pink” over it. I put a matte topcoat on the nail and pressed the hair down. Not too bad. I trimmed up the sides and beamed at my Smee nail.

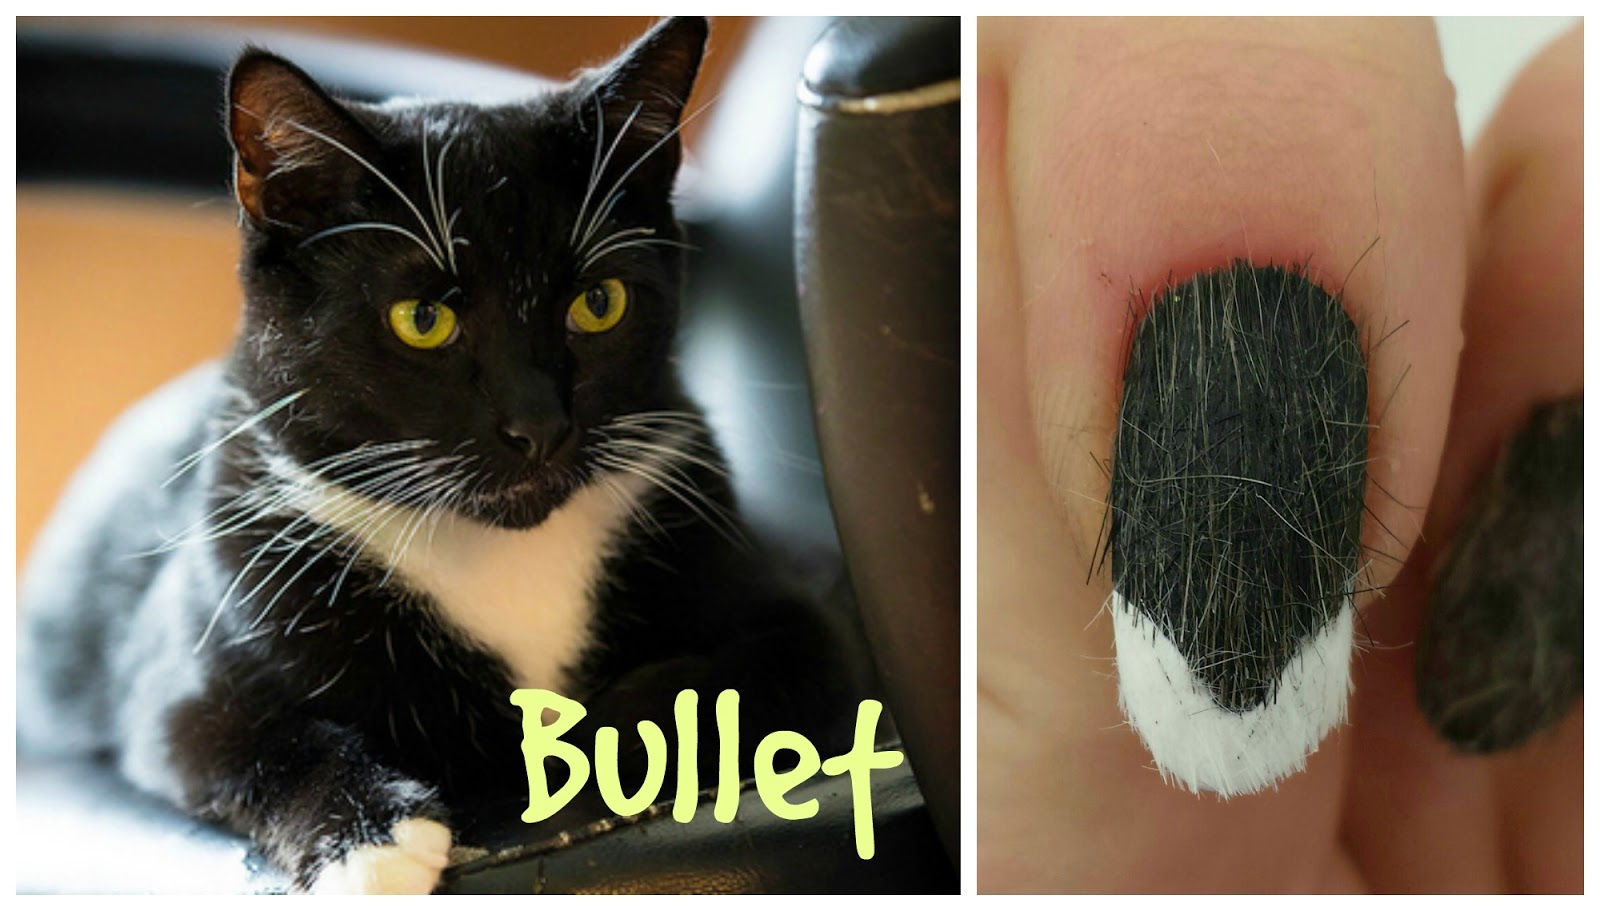
I decided my next nail would be modeled after Bullet, our male black and white kitty. I used Wet Wild "Lights Out" and "Whipped Topping" to create a tip on the nail, similar to Bullet's collar.  He laid on his back and purred as he enjoyed his brush-down. 
 I wasn’t so lucky with Grenade, Bullet’s brown tabby brother, so I used some scissors to snip a little pinch of fur from under his leg. A little catnip and I was forgiven. I used LA Colors "Whipped" and NOPI "Promises in the  Dark" with some light sponging of the black polish to make the brown tabby pattern. 
The ring finger is modeled after one of my Lykoi boys, Pink.  I used the same Kleancolor polishes for the skin tone, and LA Colors "Lost Soul" for the gray pigmentation. You are probably saying “WTF is a Lykoi!?!” right now – click here J I fell in love with him and his brother at the shelter. I realize he isn’t what most people would describe as a cute cat – and I am totally ok with that. I fell in love with his personality, not his looks.  To me, he is beautiful inside and out.

Finally, my pinky nail is modeled after Picasso, the Cat Who Thinks He is a Dog. Really.

 The process of laying down the matte coat, applying the hair, and then trimming, was a little more laborious than I expected. For the first time ever I was putting hair on my mani instead of trying to pull hair off, and it just felt very strange. I debated on sealing the hair in with a topcoat, but I really like the 3D effect of the hair.


My husband said my nails are disgusting. I think the word "unsanitary" may have come up.  My son just shook his head and told me I was strange. I am anticipating comments stating the like, and I look forward to showing them to my hubby to reinforce the fact that IDGAF .

Tuesday, November 4, 2014

Tweed Nails inspired by Kawaii Claws


I was cruising Etsy for inspiration and came across KawaiiClaws.com. This chick is amazing! I pinned a couple of her manis to recreate. Today I used Essie "Play Date" for the base, and Essie "Full Steam Ahead" with Wet N Wild (sorry no name) to create the tweed look. I used a great tutorial from Valiantly Varnished for the tweed design, and put on the finishing touches with some rhinestones, pearls, and metal studs. :)

Thursday, October 30, 2014

Halloween Skittles - Part 2


This is the second half of my Skittles mani!

  • For my thumb, I used Essie "Fear or Desire" and topped it with Funky Fingers "Glitter Matters." 
  • I did a gradient on my pointer with the yellow and orange from The New Black Runway collection, plus some red from Wet N Wild (no name on the bottle!). The stamp is #BMH06. 
  • The middle finger is another gradient - this time with Zoya "Happi" and Essence "Breakthrough." The stamp is another from the Bundle Monster holiday collection, #BMH07. 
  • For the ring finger I used "Bewitched" from Two Gypsies, and stamped with #BMH07.
  • Finally, my little pinkie is painted with the yellow from TNB Runway collection, and stamped with #BMH08. 
And that's it! 

Wednesday, October 29, 2014

Halloween Skittles! Part I


Halloween is always a fun time of year for nail art peeps. There are so many cute ideas! I couldn't pick just one, so I decided to mix it up with a Skittle mani. I used 6 different stamps and 18 polishes, so I'm going to be breaking this up into 2 posts.


  •     I painted my thumb with NOPI "Always a Silver Lining" and stamped the adorable "Scary" stamp from My Online Shop stamp MJ#XXII. I sponged on a light black glitter polish (WnW Fergie "Rock N' Roll") around the stamp.
  •     The pointer is painted with Kleancolor "Neon Purple" and stamped with Salon Express white using stamp #m13
  •    My middle finger is a base of Essie (sorry no name on it), topped with Funky Fingers "Varsity Blue." I really like this glitter topper; it was too pretty to put anything over it. 
  •    The ring finger is Fresh Paint "Winning" stamped with Fresh Paint "Spruce Street" using Pueen stamp #PUEEN33. I added the little fimo Jack O' Lantern. I wanted it to look like a pumpkin patch, but it's kind of hard to see the vine stamping. Oh well. I still love the little pumpkin!
  •     Finally, for my pinky I used Whet "Facetious" with a light coat of the WnW "Rock N' Roll." I placed the little sequins on and topcoated them in. 
I don't normally wear skittle manis - I think they are cute, but something about the lack of symmetry on my own hands irritates me. I guess we will see how long this stays on :)


Wednesday, October 15, 2014

October is Breast Cancer Awareness Month


I had a more detailed mani in mind, but every time I would sit down to work on it, something would go wrong -- one time a stink bug landed on my pinky and drug his nasty little legs through my wet polish. After 3 tries, I gave up and decided to go with something simple. I painted the base with Nicole by OPI in "Still into Pink." This is a matte polish, and I wanted to love it, but I needed something a little more, so  I added a thin coat of Wet N Wild "Break the Ice" to add just a little shimmer. I popped on some rhinestones for the bow, added a few hearts, and there you have it!

Saturday, September 20, 2014

Inspired by Allure Nail


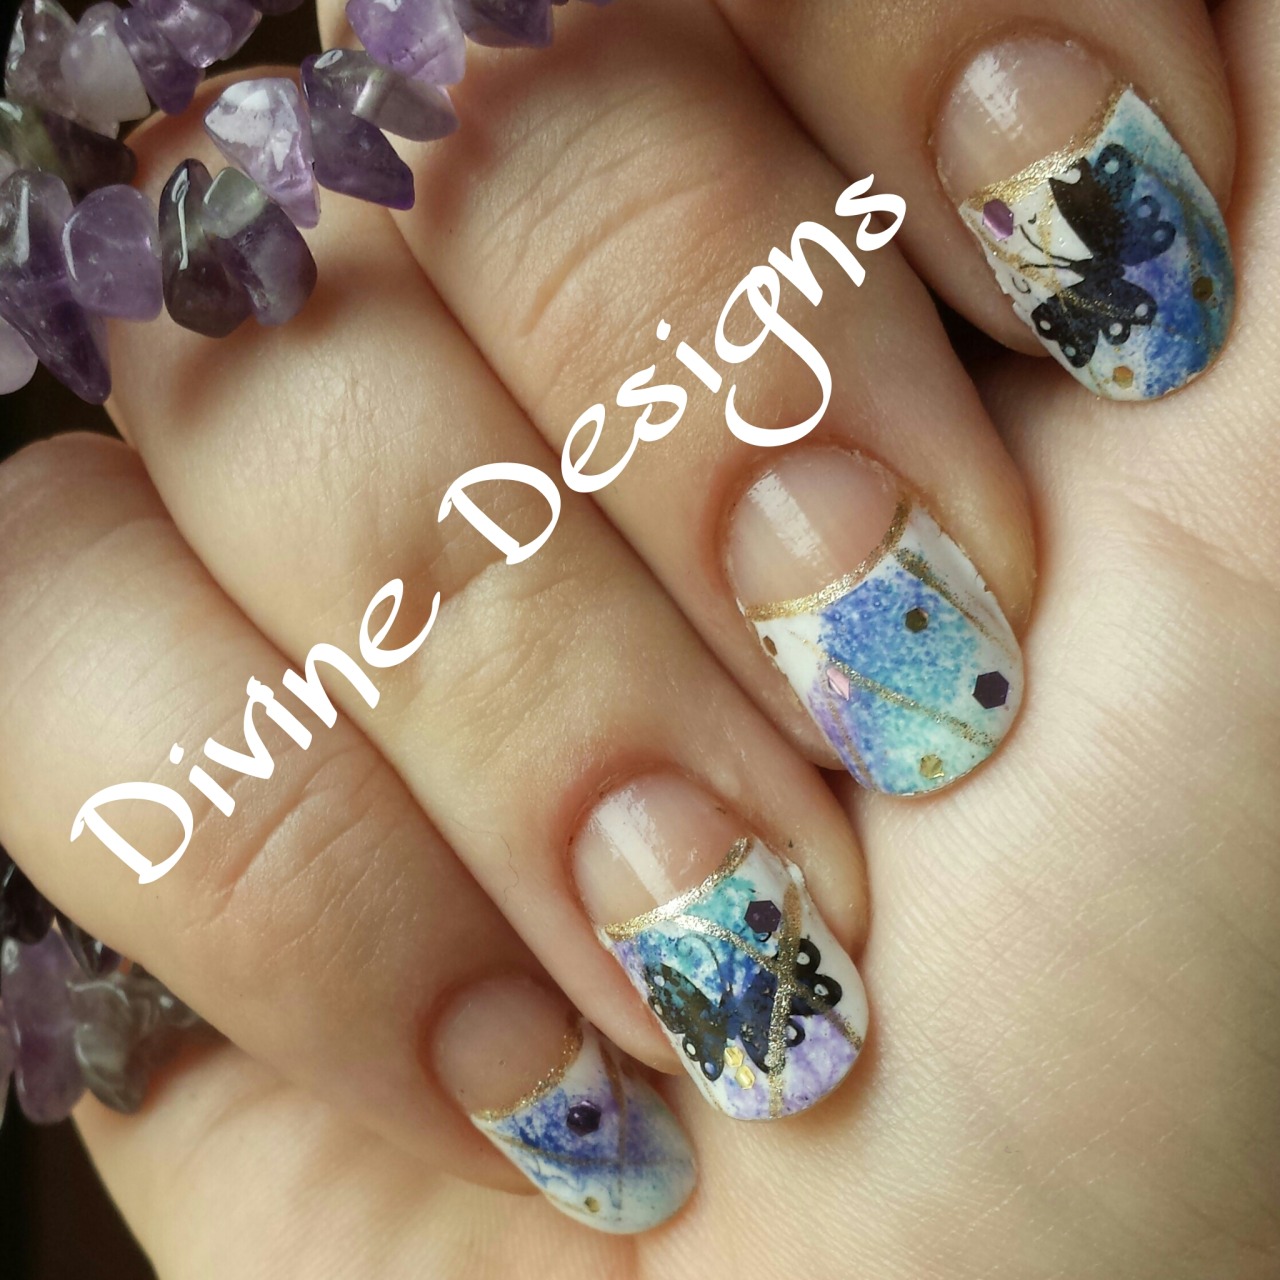
I am obsessed with nail art on Pinterest. You can see my collection of awesomeness here.  Anyway, I found this amazing design which inspired me to do the above mani. It was originally done by Allure Nail - see the original post here. I wasn’t sure I was going to like the negative half-moons, but I feel like it makes my nails look longer. I used Essie’s Blanc as my white base, then added a coat of WnW’s Break the Ice to give just a little bit of shimmer. Then I sponged some green, blue and purple randomly. I edged the half-moons with gold and added a few gold lines. The butterflies were stamped with Pueen plate #PUEEN39. A little gold and purple glitter, and Viola! Kickass mani. Love it!

Wednesday, September 17, 2014

Watercolor Trees


This mani was inspired by a picture from Pinterest. (You can see the pic here.) I decided that whining about summer being gone was useless, as I was missing being able to enjoy fall. So here we go - yay for fall, hooded sweatshirts and bonfires!
Polishes used:
The base is Essie “Blanc.” For the trees, I used some no-name black striper. The watercolor background and leaves were done in Wet N Wild “I Red a Good Book,” Sally Hansen “Mellow Yellow,” Sally Girl “Surf’s Up” (green), Sally Hansen “Blue Me Away!” and LA Colors “Reckless.”
There are multitudes of people who have tutorials on the watercolor method, so I am not going to explain it - you can easily Google it.