Showing posts with label #Essie. Show all posts

Friday, July 10, 2015

Shark Week -- Inspired by Chalkboard Nails!

When I came across this post from Chalkboard Nails, I instantly wanted to reproduce it. 

My base is Floss Gloss Wet, with a little Floss Gloss Glowstar sponged on the tips for a gradient effect. For the shark I used Zoya Ling, Essie Blanc, and WetNWild Black Creme to freehand the look.

I realized after I topcoated my design that I forgot to paint on the teeth, but I think he still looks cute. 

<3<3<3 on a side note, I would like to say that I am loving the Floss Gloss I won on Listia, and am definitely going to be looking for more. The formula (in my opinion) has staying power, it's not sheer -- ie, 2 coat max application for everything I have used so far, and the colors are great. I will definitely be investing in more Floss Gloss in the future. And - well, on a very subjective note, the bottles are just so damn cute. 

Wednesday, July 1, 2015

Happy 4th

Does anyone else find it ironic that we blow things up to celebrate the anniversary of war?

With 4th of July coming up, I was inspired by a recent email I received from Formula X to do this mani:
This is a super easy mani to do! I used striping tape and Essie "Guesso" to paint the white part of my nails. Then I added the awesome red-white-and-blue glitter topper from Funky Fingers called "Fireworks."  That's it -- simple yet festive!


Sunday, March 29, 2015

It's a Spring Thing

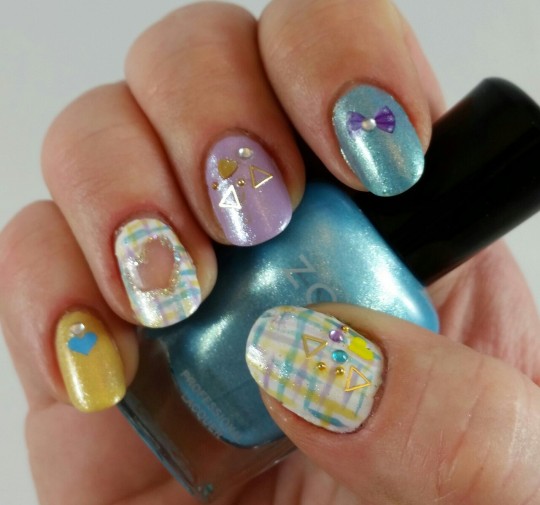
I found an artist on Instagram and Facebook called Muses Gel, out of Taiwan. Her style inspired today's Easter/Spring/Pastel mani.
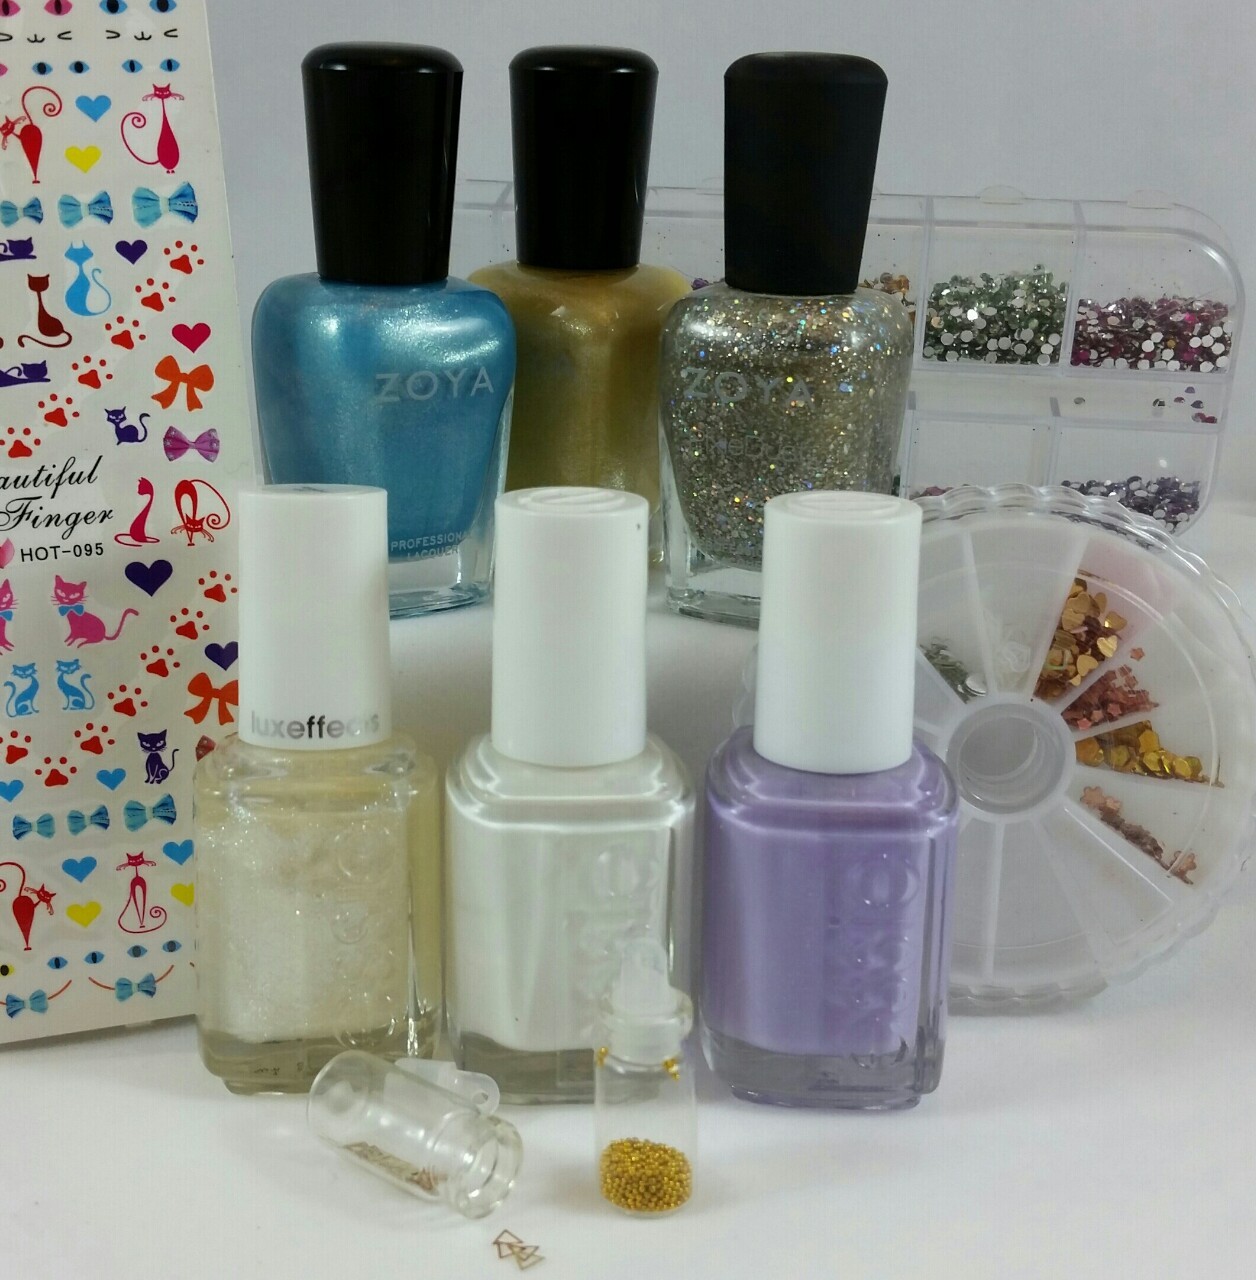
 I used a crap-ton of different products to achieve this look (see the pic below!). Polishes are Zoya "Piaf" (yellow), Zoya "Rebel" (blue), Essie "Full Steam Ahead" (lilac), and Essie "Blanc" (white). I added a layer of Essie Luxe Effects "Pure Pearfection" to give the lilac color a little more of a shimmer - similar to the Zoyas.  Zoya "Cosmo" outlines the heart on the ring finger. I added some water decals from the Born Pretty Store, some gold heart nail spangles, goldtone metal confetti triangles from Bundle Monster, rhinestones and caviar beads. I used the same tutorial that I used for my Tweed Nails on the ring finger and thumb.
I just got a new light box, and while I still have a lot to learn about it, I really like it! I think it will take a little bit of playing around to find the perfect angle.

Wednesday, March 4, 2015

Petal Tips

I received my order of Gelibility and was dying to try it! This stuff really is amazing. Previously, I had no desire to make the switch to gel polish. I like to change my polish often, and I have hundreds of bottles of regular polish that I have no intention of just leaving on a shelf. Is it weird that I have an emotional bond with my nail polish? Probably. Anyway, if you are saying "WTF is Gelibility?" right about now, fear not, for I will tell you. Gelibility is a product that you mix with regular nail polish and cure with a lamp to achieve your own DIY gel mani. Pretty freaking awesome, huh?!?

The Gelibility kit comes with two bottles - Stick It! and Fix It! You apply the Stick It" as your base/bonder. Cure. Then you mix your polish with the Fix It! in a small container or palette.( I ordered this one along with some brushes from Bundle Monster.) The instructions say to start mixing 50/50, but that you may need to adjust the amount. I did 50/50 and it worked fine for me, but I was using a sheer polish. I used Kleancolor "Sheer Pastel Nude" - I chose this color because even though you can't really see the color, it makes a nice, clean background for nail art.  This way I can change my art (using non- acetone to take off the regular polish that I am using for nail art) as many times as I like while preserving the gel mani.

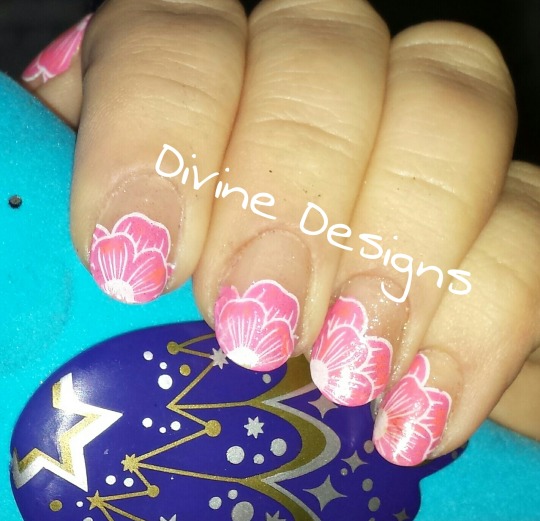
I created decals using Winstonia plate #W04 and Sally Hansen Insta Dri in "Fuchsia Flare" and Funky Fingers "Gesso." I decided I wanted to add another color onto the flower petals, so
I used a salmon striper to dot in some color here and there. Finally, a coat of Essie Luxe Effects "Pure Pearfection" gave the mani a slight sheen and shimmer.

I am so excited at the possibilities that Gelibility opens for me! This is definitely an impressive product! :)

Sunday, February 15, 2015

Conversation Hearts


Happy VD! The best thing about today is that chocolate is on sale tomorrow! Yay!

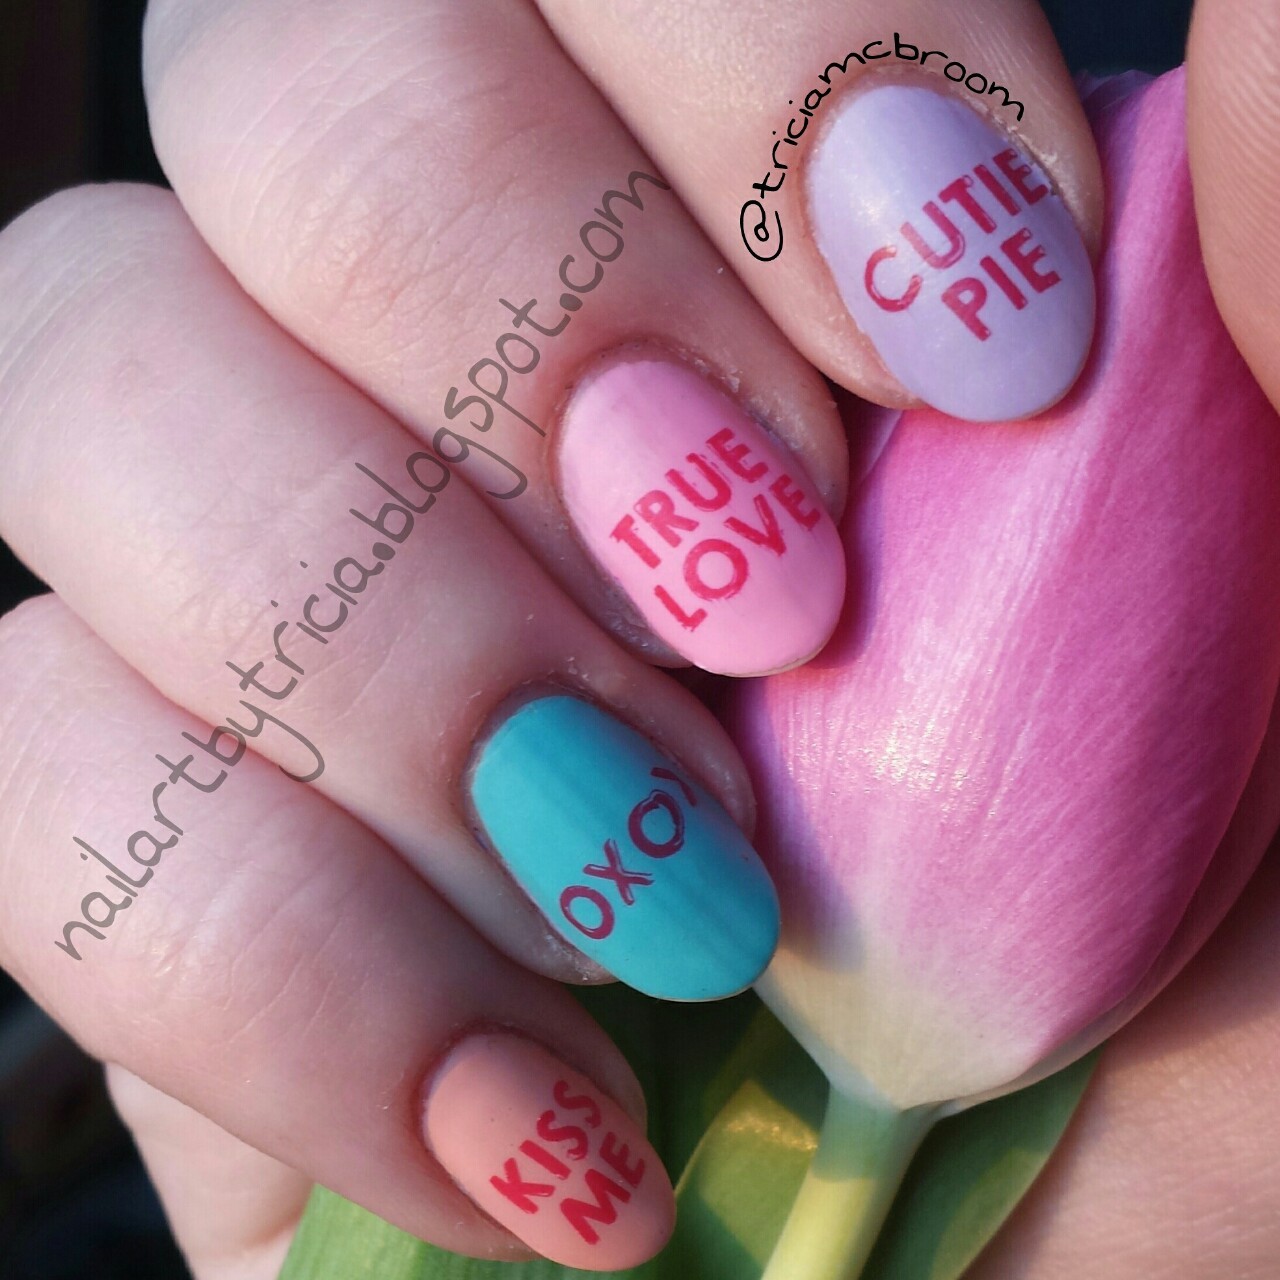
My last VD mani for the year is conversation hearts. I used a variety of pastel polishes from Kleancolor and Essie, and stamped with Kleancolor "Red" using Bundle Monster plate #BM425. Finally, I covered them all with a matte topcoat. Simple and cute.


Monday, February 9, 2015

Cold Nails


I created this set of nails to give to a special lady I know. She has been through some major ups and downs in life, but her attitude is always stellar. She is one of those people that make the world a better place.  I wanted to do something just to say thank you for being an inspiration. Her favorite band is Cold – I know she is a hard core fan – so when I began to think of what I could do for her, something from me and from my heart, I decided on making a set of Cold-themed nails. I had to do some research, because I admittedly know nothing about the band. I decided to incorporate their logo and the trademark spider (I didn’t *f* up the L’s in the logo, that is how it’s supposed to be!).

I chose a black, white and silver color scheme, using Essie “Blanc,” Zoya “Imogen,” Wet N Wild “Lights Out” and a no-name silver bottle of Icing polish. The spider stamp is from Shany plate #SH09. The lettering is from fauxnad plates #m17 and #m18, and the lightning print is from Bundle Monster #BM305.  This was my first time using the nail art chains, and it was a lot easier than I thought it was going to be. I used the chain, a small jump ring, and a rhinestone to make (what I think is) a kickass little necklace.  It took about 15 hours to make these – a few of the nails, I scrapped and started over again.

Even if she never wears them, I hope that when she looks at them, she remembers what a blessing she is.


Wednesday, January 7, 2015

NYE Nails - C-Ya 2014!

So I am a week late with posting this mani, but better late then never, right?!?  I was so exhausted from our Christmas trip that NYE consisted of sitting on the couch with my kids, trying to stay awake until Midnight. Wild and crazy times! My nails definitely had a better time than I did.
 My base polish is Essie's "Over the Edge," which has been described as a "metallic midnight silver." It's an almost-black-but-not-really with just a hint of shimmer. I used Bundle Monster's plate #BM-H14 to stamp the fireworks in white, and then lead-lighted the colors in. The cityscape is from another Bundle Monster plate, this one is #BM-414. I pulled the music notes from a Pueen plate (#PUEEN47), and the cute little cocktail glasses are from Gals Cosmetics (#GA9).

Tuesday, November 4, 2014

Tweed Nails inspired by Kawaii Claws


I was cruising Etsy for inspiration and came across KawaiiClaws.com. This chick is amazing! I pinned a couple of her manis to recreate. Today I used Essie "Play Date" for the base, and Essie "Full Steam Ahead" with Wet N Wild (sorry no name) to create the tweed look. I used a great tutorial from Valiantly Varnished for the tweed design, and put on the finishing touches with some rhinestones, pearls, and metal studs. :)

Thursday, October 30, 2014

Halloween Skittles - Part 2


This is the second half of my Skittles mani!

  • For my thumb, I used Essie "Fear or Desire" and topped it with Funky Fingers "Glitter Matters." 
  • I did a gradient on my pointer with the yellow and orange from The New Black Runway collection, plus some red from Wet N Wild (no name on the bottle!). The stamp is #BMH06. 
  • The middle finger is another gradient - this time with Zoya "Happi" and Essence "Breakthrough." The stamp is another from the Bundle Monster holiday collection, #BMH07. 
  • For the ring finger I used "Bewitched" from Two Gypsies, and stamped with #BMH07.
  • Finally, my little pinkie is painted with the yellow from TNB Runway collection, and stamped with #BMH08. 
And that's it! 

Wednesday, October 29, 2014

Halloween Skittles! Part I


Halloween is always a fun time of year for nail art peeps. There are so many cute ideas! I couldn't pick just one, so I decided to mix it up with a Skittle mani. I used 6 different stamps and 18 polishes, so I'm going to be breaking this up into 2 posts.


  •     I painted my thumb with NOPI "Always a Silver Lining" and stamped the adorable "Scary" stamp from My Online Shop stamp MJ#XXII. I sponged on a light black glitter polish (WnW Fergie "Rock N' Roll") around the stamp.
  •     The pointer is painted with Kleancolor "Neon Purple" and stamped with Salon Express white using stamp #m13
  •    My middle finger is a base of Essie (sorry no name on it), topped with Funky Fingers "Varsity Blue." I really like this glitter topper; it was too pretty to put anything over it. 
  •    The ring finger is Fresh Paint "Winning" stamped with Fresh Paint "Spruce Street" using Pueen stamp #PUEEN33. I added the little fimo Jack O' Lantern. I wanted it to look like a pumpkin patch, but it's kind of hard to see the vine stamping. Oh well. I still love the little pumpkin!
  •     Finally, for my pinky I used Whet "Facetious" with a light coat of the WnW "Rock N' Roll." I placed the little sequins on and topcoated them in. 
I don't normally wear skittle manis - I think they are cute, but something about the lack of symmetry on my own hands irritates me. I guess we will see how long this stays on :)


Saturday, September 20, 2014

Inspired by Allure Nail


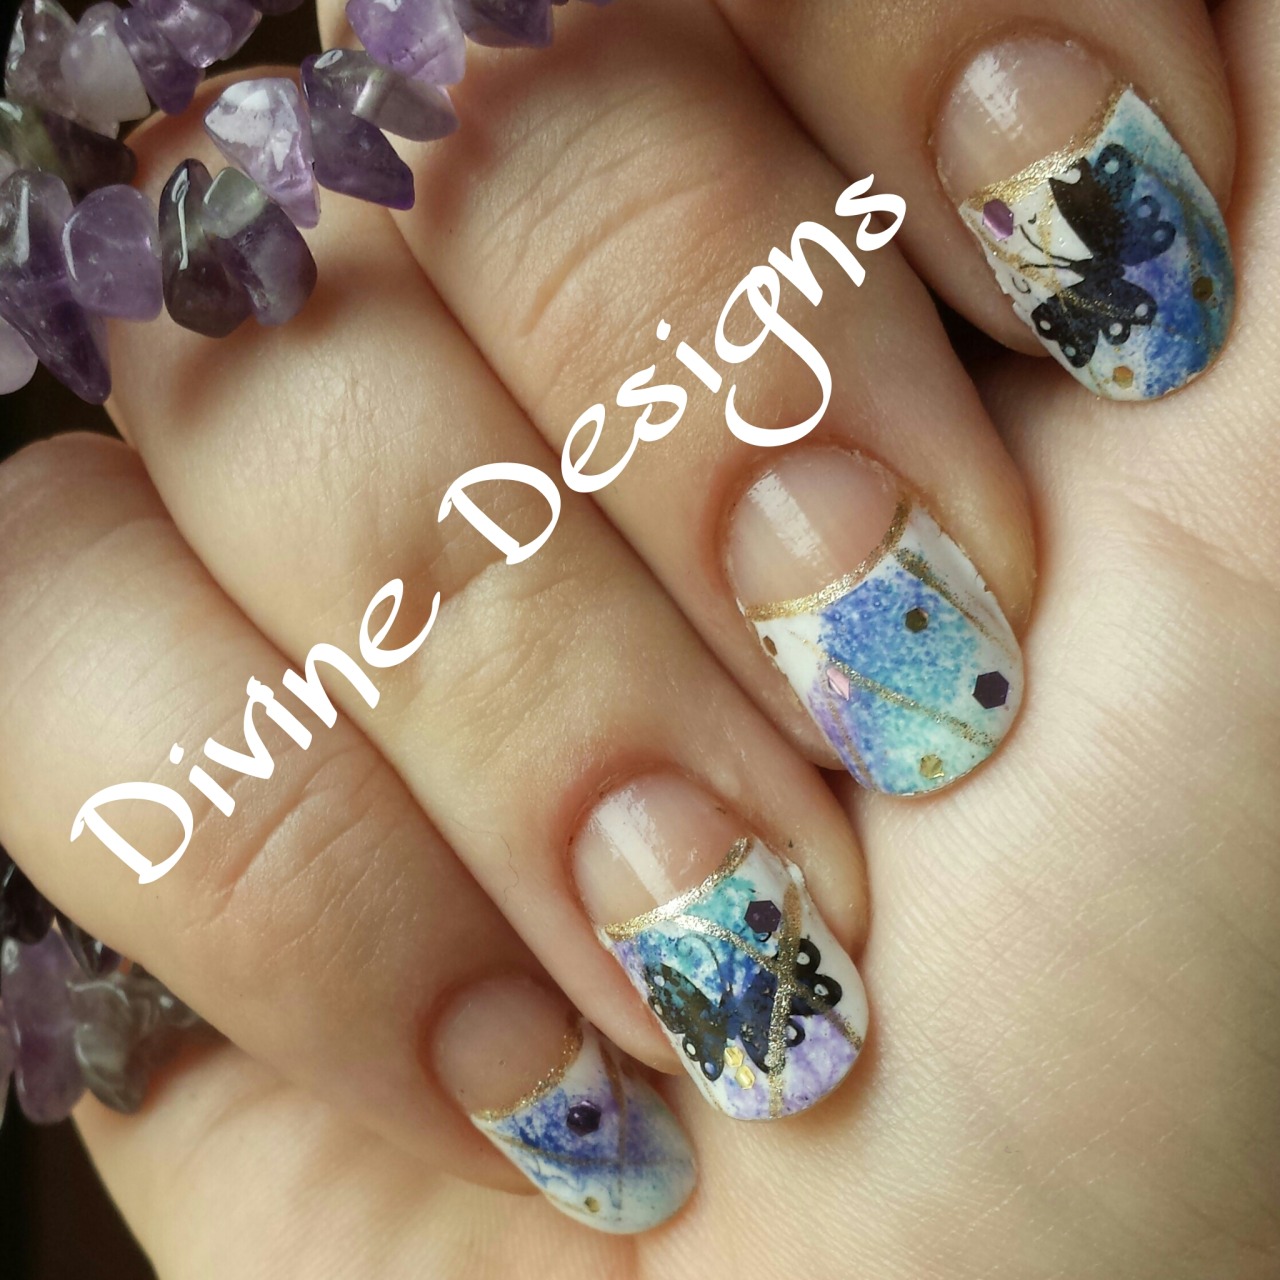
I am obsessed with nail art on Pinterest. You can see my collection of awesomeness here.  Anyway, I found this amazing design which inspired me to do the above mani. It was originally done by Allure Nail - see the original post here. I wasn’t sure I was going to like the negative half-moons, but I feel like it makes my nails look longer. I used Essie’s Blanc as my white base, then added a coat of WnW’s Break the Ice to give just a little bit of shimmer. Then I sponged some green, blue and purple randomly. I edged the half-moons with gold and added a few gold lines. The butterflies were stamped with Pueen plate #PUEEN39. A little gold and purple glitter, and Viola! Kickass mani. Love it!

Wednesday, September 17, 2014

Watercolor Trees


This mani was inspired by a picture from Pinterest. (You can see the pic here.) I decided that whining about summer being gone was useless, as I was missing being able to enjoy fall. So here we go - yay for fall, hooded sweatshirts and bonfires!
Polishes used:
The base is Essie “Blanc.” For the trees, I used some no-name black striper. The watercolor background and leaves were done in Wet N Wild “I Red a Good Book,” Sally Hansen “Mellow Yellow,” Sally Girl “Surf’s Up” (green), Sally Hansen “Blue Me Away!” and LA Colors “Reckless.”
There are multitudes of people who have tutorials on the watercolor method, so I am not going to explain it - you can easily Google it. 

Tuesday, September 16, 2014

Funky Fingers “Olaf”

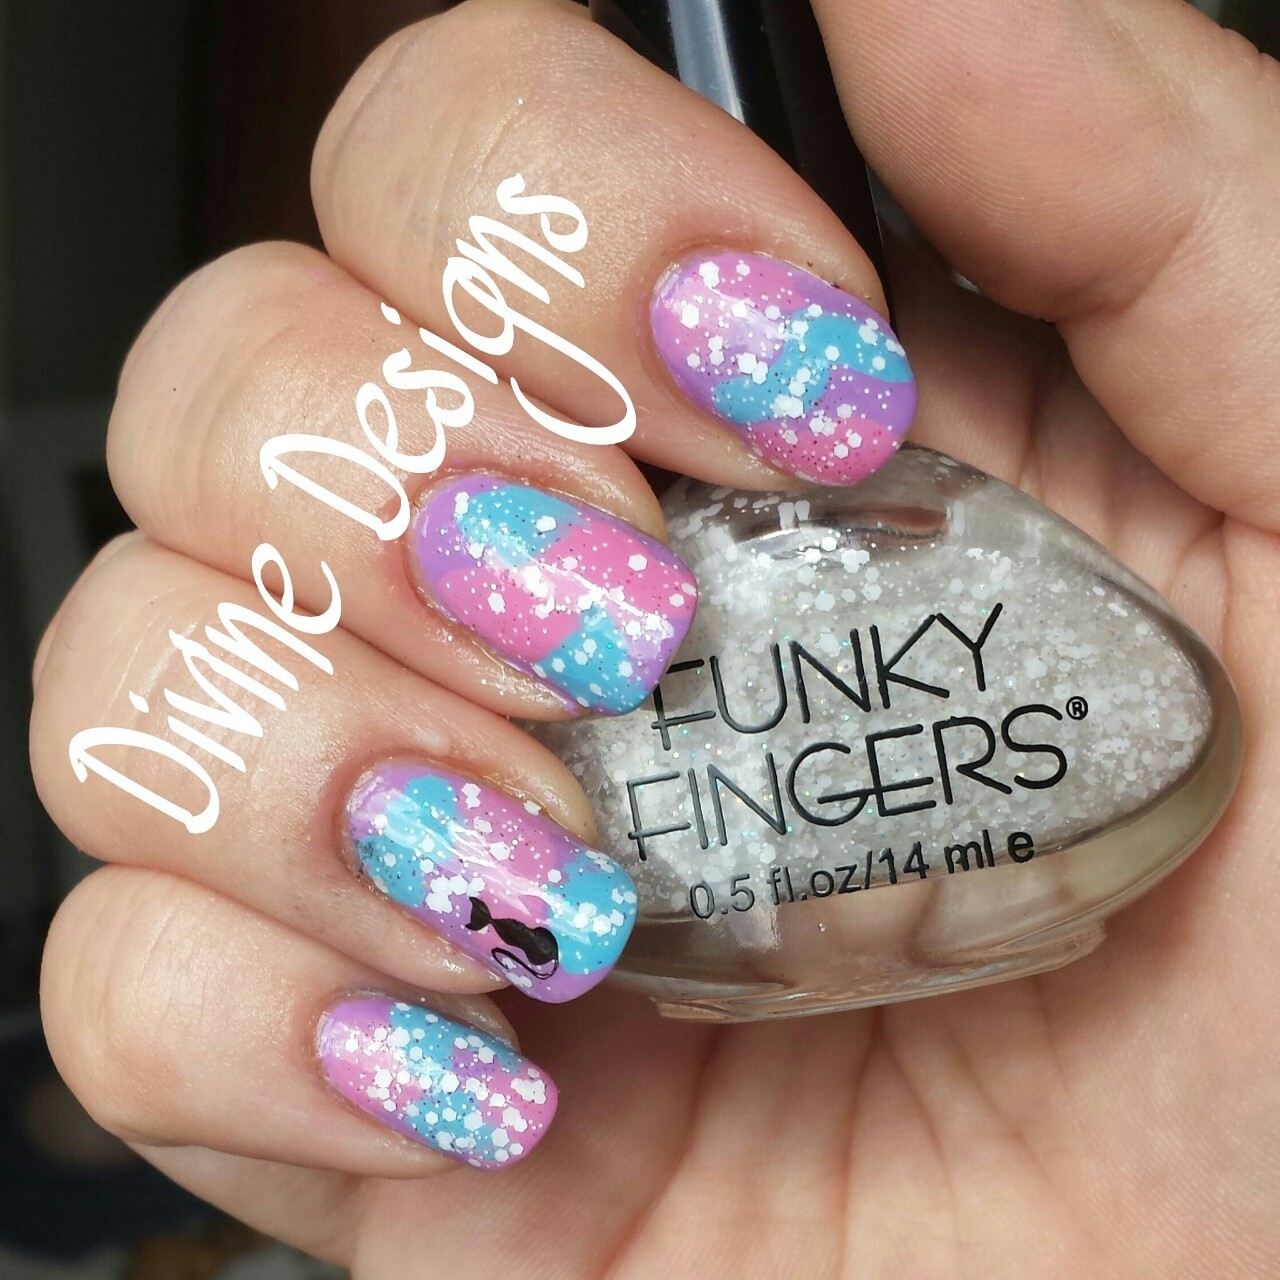
I was very excited to try my new Funky Fingers polishes. I painted the base purple (Essie "Play Date"), and randomly painted on blue (Salon Perfect "Baby Blues") and pink (Milani "Tip Toe Pink"). I topped it with the new FF in "Olaf," which contains iridescent micro glitter as well as small white glitters. My finishing touch was a kitty stamped on my ring finger (MoYou Princess collection #3). I sealed it all in with Poshe topcoat, even though I didn’t feel like I had to have it ~ Olaf was pretty thick. ;)

Sunday, September 14, 2014

New Bundle Monster Sun Kissed plates


Summer is not gone yet! I keep telling myself that. I decided a good beach-inspired mani would keep me in the summer spirit - plus I just received my new plates from Bundle Monster! You can check them out here. For a limited time you can get the set of 10 for only $7.99! 
Here’s the breakdown:
Pinky finger: Base is Essie “Blanc.” Stamped the gold tritons (you can barely see them) with ELF “Pot of Gold and BM-509. Directional circle is from plate BM-507 and Salon Express black.  There is a small black rhinestone in the center of the circle.
Ring finger: Base is a beige from The New Black’s Runway collection. I used the Salon Express black again to stamp the palm trees from BM-510.
Middle finger: Base is Kleancolor “Sheer Pastel Pink.” Shells are plate BM-505 and I used Salon Express white. I need a brighter white. 
Index finger: Base is Fresh Paint “Firefly.” Waves are stamped with Salon Perfect “Baby Blues” and BM-509. Mermaid is Salon Express black and BM-510. I added a few small pieces of glitter for “bubbles.”
Thumb: Used The New Black again, and stamped with Salon Express white. BM-505.
I am pretty pleased with how this turned out; I just wish the white shells would have shown up better. Guess it’s time to invest in a better white - but the question is Konad or Mundo de Unas? Also, I wish I would have used a small gold stud in the center of the directional circle, instead of the black rhinestone. You can’t see it.  You can, however, see the cat hair on my thumb in the last picture. That is Bullet’s contribution - he worked so hard sleeping next to me, I felt awful taking it off. Not really, but we have 8 cats, so hair is an accessory. Maybe one day I will do cat hair nails...

Thursday, September 11, 2014

Cosmic Kitties & Welcome!


This is my first post on Blogger. If you are reading this, thanks for taking the time to stop by! I guess I will write an intro about myself eventually, but nail art is more interesting than me, so let's move on :)

Today’s mani is a depiction of something that rarely ever happens - the idea in my head actually looks like what is on my nails. What a nice change! :)
I used Essence “Hello Marshmallow!” as my base, and did a double stamping of the wavy image on plate m69. I really didn’t intend to do a double stamp, but the first blue I used (Kleancolor “Pastel Blue”) wasn’t very dark, so I overlaid it with Salon Perfect “Baby Blues.” The little stars are from stamp m14, with Essie “Blanc.” Lastly, I used cat water decals from Bundle Monster for my Cosmic Kitty look. I finished off with Poshe Topcoat.  
I was pretty impressed with the decals from Bundle Monster - you can see them here. I thought I was only getting one sheet, but I was pleasantly surprised with all three! For under $2, it was definitely a bargain.