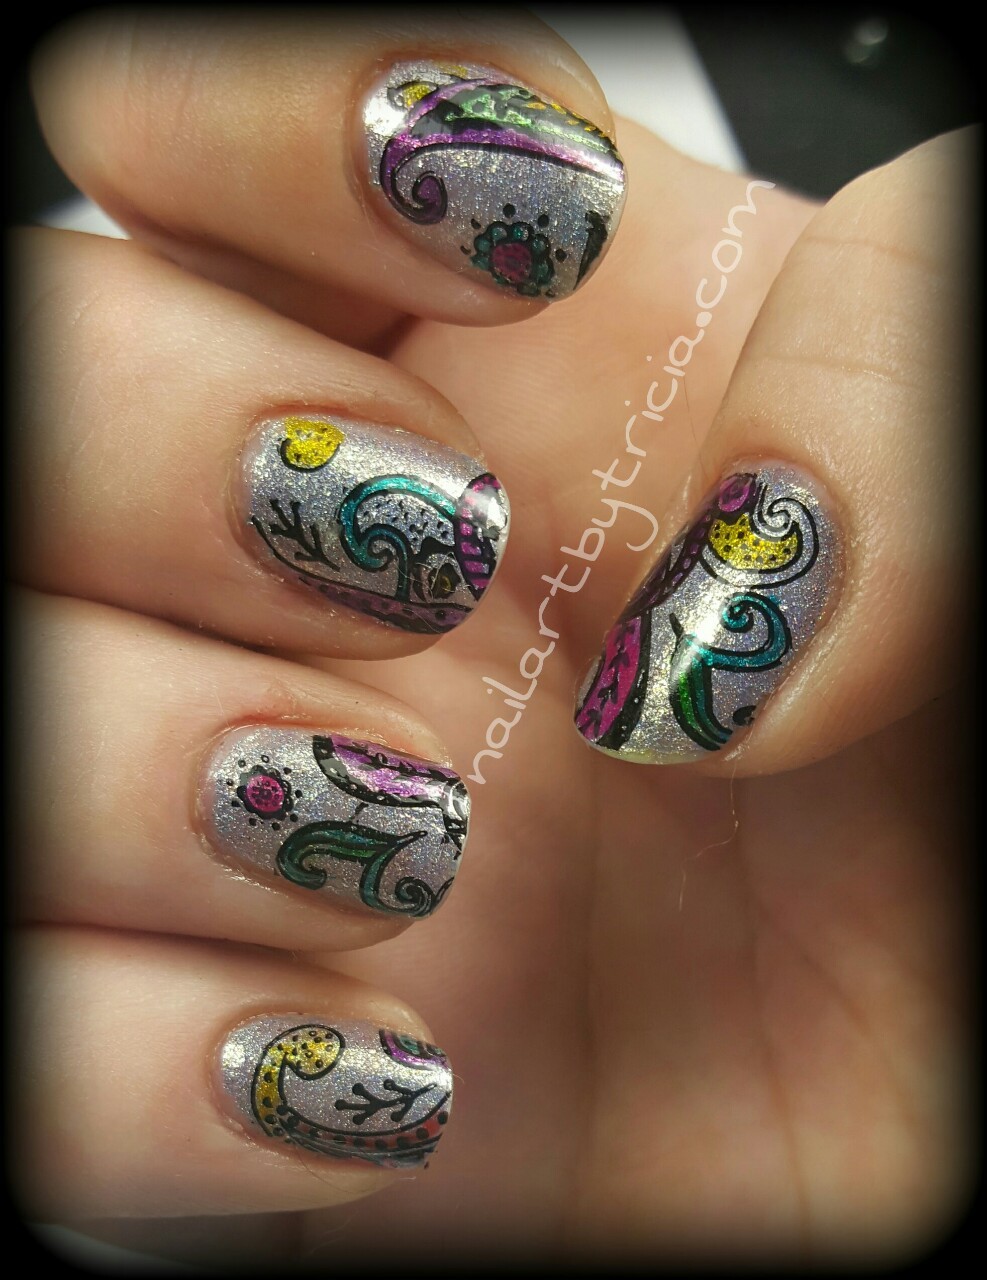
The stamp is #Hehe006. These are my first Hehe stamps, and I really like them! My base is Indigo Bananas "Taffeta, Darling?" After I stamped the images, I colored them in with OPI Color Paints.
Showing posts with label #OPI. Show all posts
Monday, November 16, 2015
Thursday, October 1, 2015
Warning: Toes Ahead!
I don't normally show my pedis because I think that feet are gross in general, but I really like this one :)
My inspiration came from this pin that has been on my "Toes To Do" for some time.
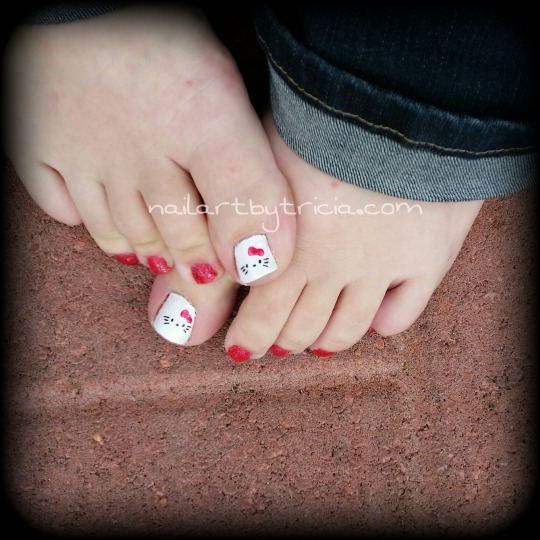
I purposely didn't take a close-up, so it's kinda hard to see the great detailed glitteriness of the red polish. I used OPI Liquid Sand in "The Impossible" on all the little toes, plus on the bow. For the big toe, I used Funky Fingers in "Guesso" and stamped the cute little Hello Kitty face from plate #QA24.
Sadly, flip flop season is coming to a close here, but there are still so many cute designs that I want to do. Usually I give my toenails a brake with the paint until spring. What do you think -- Do you paint your toes in the winter?
My inspiration came from this pin that has been on my "Toes To Do" for some time.
I purposely didn't take a close-up, so it's kinda hard to see the great detailed glitteriness of the red polish. I used OPI Liquid Sand in "The Impossible" on all the little toes, plus on the bow. For the big toe, I used Funky Fingers in "Guesso" and stamped the cute little Hello Kitty face from plate #QA24.
Sadly, flip flop season is coming to a close here, but there are still so many cute designs that I want to do. Usually I give my toenails a brake with the paint until spring. What do you think -- Do you paint your toes in the winter?
Sunday, September 20, 2015
Myst-iqual Nails
Hello people! I have been a major slackass with the blog, but for good reason! I have officially earned my license as an Esthetician. :) Now, I am working on my Nail Tech license. It feels great getting to do what I love all day.
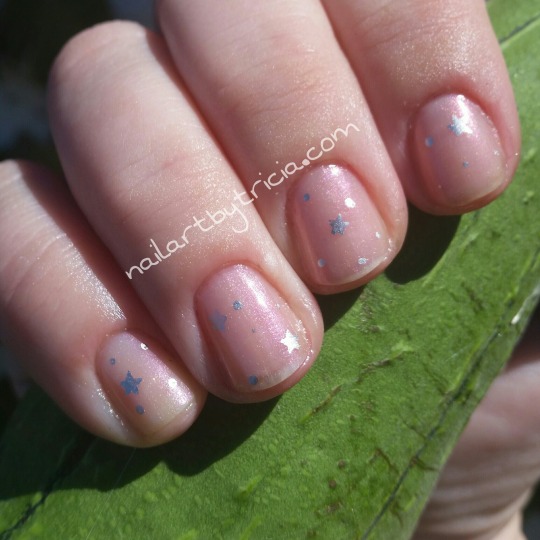
Getting back on the mani track, today's mani is very simplistic, but I love it. It is inspired by this pin from Hokuri. To recreate this delicate look, I used 2 coats of Sally Hansen Diamond Strength in "Myst-ique Pink" - this bottle of polish is so old, I have no clue if it's even made any more. I had to brush a layer of dust off it before using it.
Next, I used OPI's "Push and Shove," which is the chrome from the Gwen Stefani collection, for the stars and dots.
You may be asking yourself, what on Earth is she holding in that pic? Why, I am glad you asked. It's a loofah - yes that thing in your shower. Turns out it's first a veggie, like a squash or zucchini, but then you dry it out. The dryed out inside is your favorite exfoliating tool. This is my first year growing loofah, so we will see what happens when I dry this bad boy out. Have you ever grown loofah? If so, how did it turn out?
Getting back on the mani track, today's mani is very simplistic, but I love it. It is inspired by this pin from Hokuri. To recreate this delicate look, I used 2 coats of Sally Hansen Diamond Strength in "Myst-ique Pink" - this bottle of polish is so old, I have no clue if it's even made any more. I had to brush a layer of dust off it before using it.
Next, I used OPI's "Push and Shove," which is the chrome from the Gwen Stefani collection, for the stars and dots.
You may be asking yourself, what on Earth is she holding in that pic? Why, I am glad you asked. It's a loofah - yes that thing in your shower. Turns out it's first a veggie, like a squash or zucchini, but then you dry it out. The dryed out inside is your favorite exfoliating tool. This is my first year growing loofah, so we will see what happens when I dry this bad boy out. Have you ever grown loofah? If so, how did it turn out?
Saturday, June 13, 2015
Margarita nails
One of my favorite summer activities is enjoying a nice, refreshing margarita on a hot summer day.
Unfortunately, today was not one of those days. So I put margaritas on my nails instead. :)
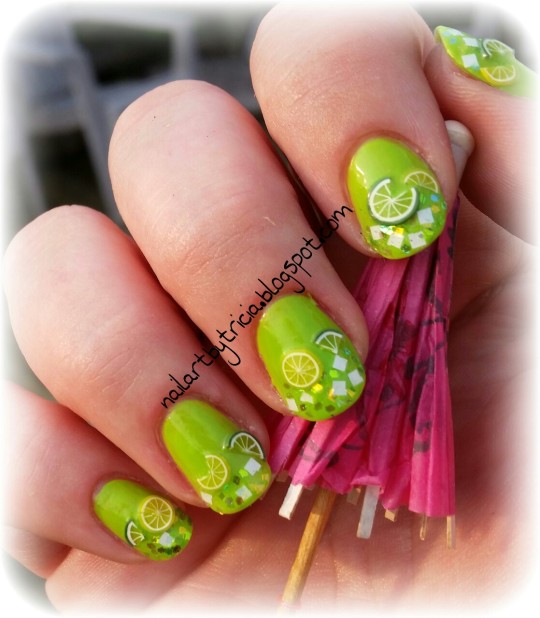
My base is "Mint" by LA Colors. On my tips I used OPI's "Lights of Emerald City" to give the look of salt on the rim. "Lights of Emerald City" is a nice glitter topper from OPI - it has white square glitter as well as small iridescent glitter as well. I think it worked quite nice for this theme. Finally, I added some lemon and lime fimo, in a variety of shapes, and top-coated the h3!! out of them.
Now if I only had some tequila.
Unfortunately, today was not one of those days. So I put margaritas on my nails instead. :)
My base is "Mint" by LA Colors. On my tips I used OPI's "Lights of Emerald City" to give the look of salt on the rim. "Lights of Emerald City" is a nice glitter topper from OPI - it has white square glitter as well as small iridescent glitter as well. I think it worked quite nice for this theme. Finally, I added some lemon and lime fimo, in a variety of shapes, and top-coated the h3!! out of them.
Now if I only had some tequila.
Tuesday, January 27, 2015
From the Pinterest Vault
Today's mani is from one of the many that I have stored in my Pinterest Nail Art stash.
When I choose someone else's mani to recreate, I do a little research (beyond just looking at the pic) on the original artist so that I may give credit where it is due. I was pleasantly pleased with Miriam Elizabeth's work -- you can find her Facebook page here and Instagram here -- you too can be inspired by her creativity! The original mani which serves as my inspiration can be seen
here.
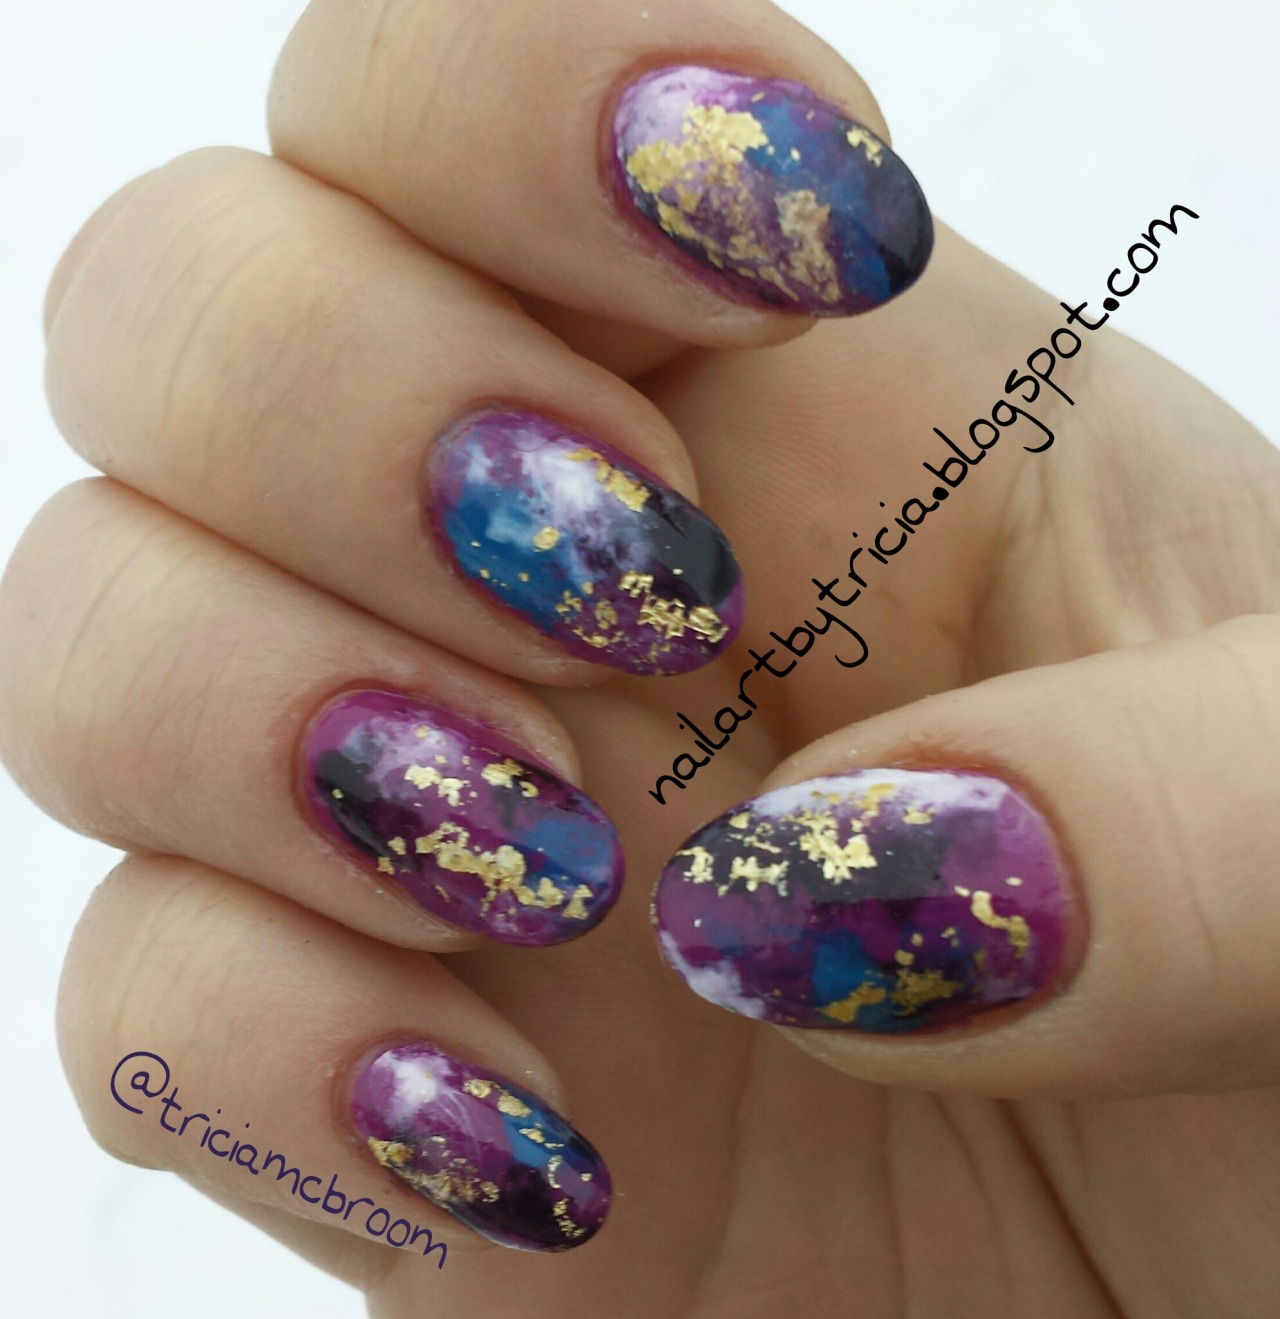
I used Essence "Breakthrough" as my base, and added the purple (OPI "Siberian Nights), blue (Zoya "Ling") and White (Funky Fingers "Gesso") by using the watercolor technique . As the final touch, I added some gold nail foil. This time, I decided to use the nail foil glue, like you are supposed to do. Usually I use my quick-dry top coat. Musta had the big girl panties on. Long story short, I do not care for the nail glue.
Bottom line, this is one of those manis that I keep staring at my own fingers. I love it. I will definitely be trying to recreate mroe of Miriam's work in the near future. :)
When I choose someone else's mani to recreate, I do a little research (beyond just looking at the pic) on the original artist so that I may give credit where it is due. I was pleasantly pleased with Miriam Elizabeth's work -- you can find her Facebook page here and Instagram here -- you too can be inspired by her creativity! The original mani which serves as my inspiration can be seen
I used Essence "Breakthrough" as my base, and added the purple (OPI "Siberian Nights), blue (Zoya "Ling") and White (Funky Fingers "Gesso") by using the watercolor technique . As the final touch, I added some gold nail foil. This time, I decided to use the nail foil glue, like you are supposed to do. Usually I use my quick-dry top coat. Musta had the big girl panties on. Long story short, I do not care for the nail glue.
Bottom line, this is one of those manis that I keep staring at my own fingers. I love it. I will definitely be trying to recreate mroe of Miriam's work in the near future. :)
Saturday, December 6, 2014
My Worst Nightmare
Ok, so it's not my worst nightmare, but it surely sucks. I cracked my pinky nail, about 1/4 of the way across my nail. I have no idea how, when or where I broke it - I just looked down and noticed a little crack....and then proceeded to curse.
Do you see that?!?!! Yeah, how much do you think that would hurt if I took it off? Hell NAW. So I decided to patch it. I used a tutorial I saw on Pinterest, using a tea bag as a patch. I emptied out a small tea bag, and cut myself a small square to cover the cracked area. I placed a small dot of nail glue on the break, and then laid down the patch. I then proceeded to smother that biyatch with more nail glue. It took a good while to dry - longer than I thought it would, but that was a good thing, since it allowed me to move the patch around with tweezers so it was positioned perfectly. After about 15 minutes, I lightly buffed the glue and added a coat of Nail Envy. (**If you have never used OPI Nail Envy, IMO it is worth every penny.)
Now I am off to paint these nails (no naked nails! ack!), and we will see how my little patch holds up.
I really just wanted to say that I tea-bagged myself. :P
Have you ever used this technique? Did it work for you? Ususally I say F*ckit and cut it off, but I want some length to do some bangin Christmas designs!
Now I am off to paint these nails (no naked nails! ack!), and we will see how my little patch holds up.
I really just wanted to say that I tea-bagged myself. :P
Have you ever used this technique? Did it work for you? Ususally I say F*ckit and cut it off, but I want some length to do some bangin Christmas designs!
Subscribe to:
Posts (Atom)