

Showing posts with label #naildesign. Show all posts
Showing posts with label #naildesign. Show all posts
Thursday, March 17, 2016
Inspired by Stephanie Loesch
Today's nails are a re-creation of an amazing mani I saw on Pinterest by Stephanie Loesch -- an amazing nail artist! Be sure to check her out on Instagram @_stephsnails_


Tuesday, January 26, 2016
Shattered Glass
I finally got my hands on some holo foil paper from Born Pretty Store to create some shattered glass nail art!
 My base is "Wet Suit" by Sally Hansen - I love this color! Is it grey, blue, purple or a combo? I'm not really sure, but I like it. I cut the holographic sheets of mylar into tiny strips, and applied them using a clear coat. I used Seche Vite to seal everything in, and that was it! This is a really pretty look that is fairly easy (albeit slightly time consuming) to create. I can't wait to use more of this in the future.
Friday, December 18, 2015
The Force Awakens
Today is the day!!!! I am beyond excited about this movie. Star Wars was a staple in our household growing up. We watched the movies, and ran around outside playing pretend with sticks as "blasters."
Naturally, I had to rep my love on my digits.
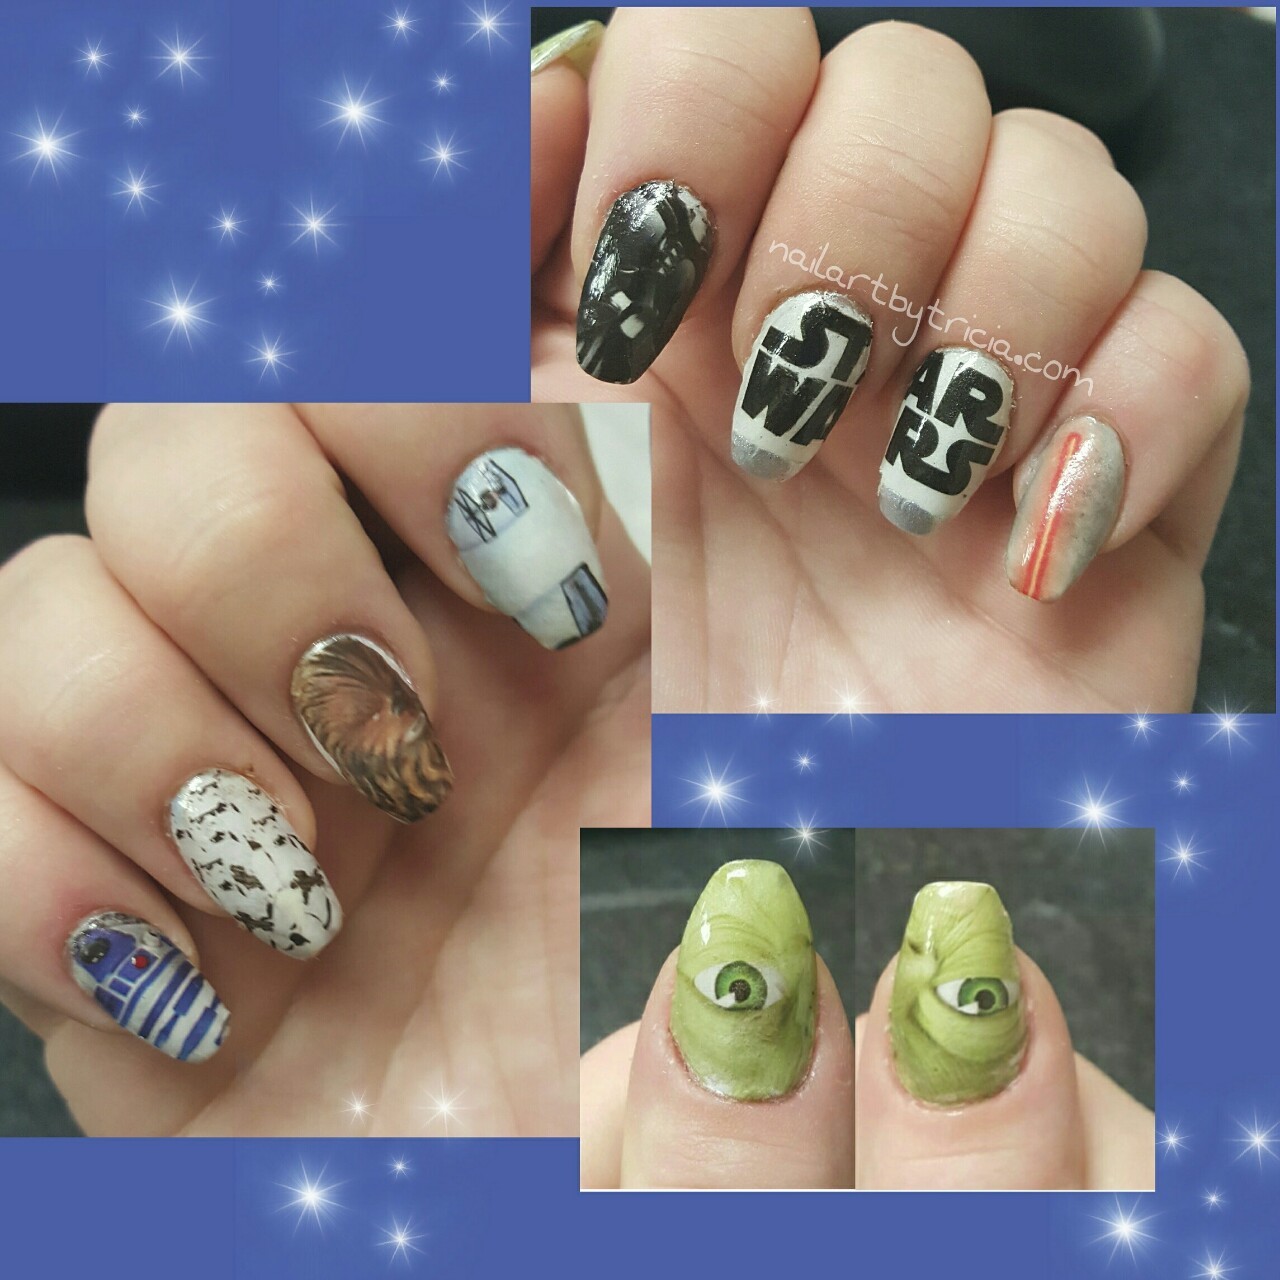 I used a decal method utilizing magazine pages - in this case, I used a Toys R Us catalog. This article from NailPro has a great tutorial video. It is a somewhat time consuming technique, but I feel the payoff is well worth it :) What do you think? Have you tried this method?
Naturally, I had to rep my love on my digits.
Friday, August 21, 2015
Grayscale Geode, Inspired by the Lovely Lady Alayna
I started my Nail Technician classes this week, and I am very excited to be able to focus on my love. I saw this mani on Pinterest by Lady Alayna, and it was an instant "do me now" project.
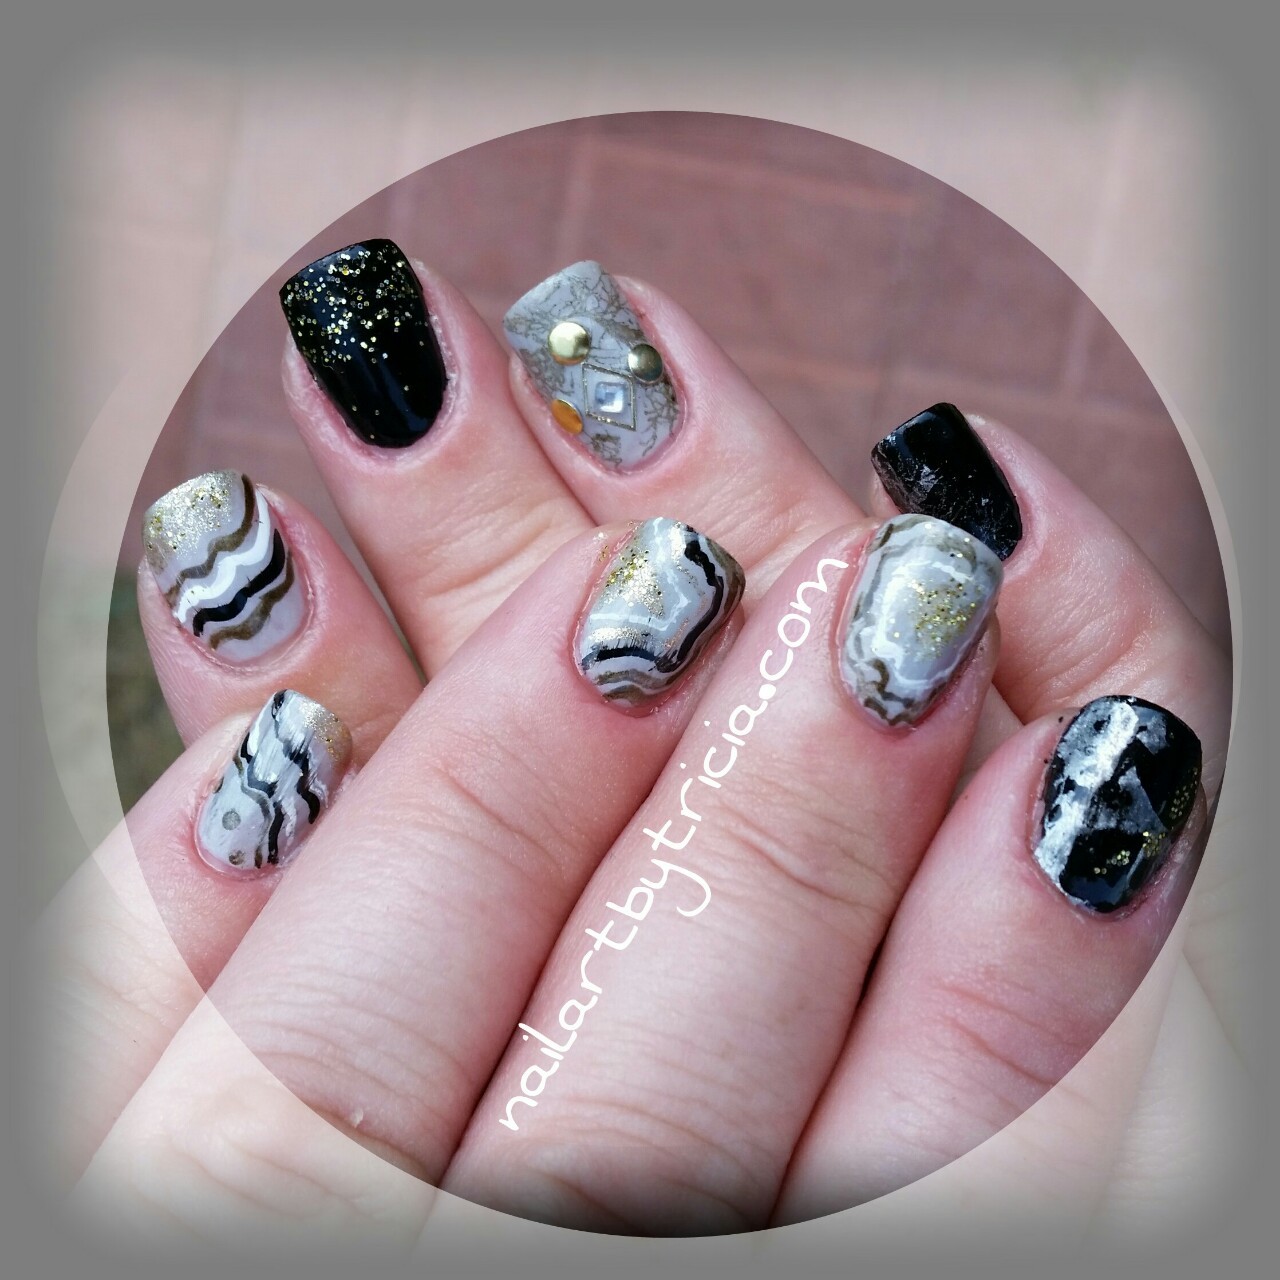 Although I have admired the geode nail art for some time, this was my first time attempting it. I used a fine art brush and various polishes to create the geode design. In hindsight, I will either 1) use acetone to soften the lines or 2) use watered down acrylic paint instead. I added a slight pinch of loose gold microglitter to the golden centers of the geodes.
The remaining nails are done with a variety of techniques, including stamping, spray water marbling (shout out to Liquid Palisade for making water marbling and stamping infinitely easier to do) and glitter placement, along with a few goldtone accessories and a rhinestone.
This was tremendously fun yet challenging - there will definitely be more geode nail art in my future. What do you think - have you tried this type of nail art before? What did you think -- any tips? I'd love to hear from you :)
The remaining nails are done with a variety of techniques, including stamping, spray water marbling (shout out to Liquid Palisade for making water marbling and stamping infinitely easier to do) and glitter placement, along with a few goldtone accessories and a rhinestone.
This was tremendously fun yet challenging - there will definitely be more geode nail art in my future. What do you think - have you tried this type of nail art before? What did you think -- any tips? I'd love to hear from you :)
Monday, August 3, 2015
Gelibility + Crushed Shell Nail Art
Today I did my first and last crushed shell nail art mani!
I have had a package of little bottles, containing plastic crushed shell/iridescent looking stuff - I am really not technically certain what this material is called - sitting, untouched, unloved. No time like the present! - only thing is, I am not really 100% certain what I am supposed to do with this stuff. It's experiment time! Here's my tools:
 I started out by using Gelibility to turn my China Glaze "Travel in Color" into a sheer base coat. I elected to use the Gelibility in hopes that the added thickness of the gel will sandwich in the little glittery pieces. After two coats of polish, I used my dotting tool to place the shell/glitter/whatever this substance is onto my nails. It took two more layers of Gelibility to really seal in the shards, and even with that I can still feel some of the material when I brush my fingers against my nails. I added a little gold shell and a pearl as an accent, and that was it!
 I felt like this mani was more time consuming than it was worth. I still don 't even know if I used this stuff correctly (or should I say for the reason it was intended). Have you ever used this stuff? I would love to hear other people's experiences with this --- what is this stuff called?!? (for the record, the packaging said nothing.)
I have had a package of little bottles, containing plastic crushed shell/iridescent looking stuff - I am really not technically certain what this material is called - sitting, untouched, unloved. No time like the present! - only thing is, I am not really 100% certain what I am supposed to do with this stuff. It's experiment time! Here's my tools:
Friday, March 20, 2015
Nails Mag Recreations
I always look forward to my nail mags - even though print media is going out of style, it's still nice to turn those pages every once in a while. The March 2015 edition of Nails Magazine was no exception. In fact, I loved a few of the designs so much that I immediately felt the urge to re-create them!
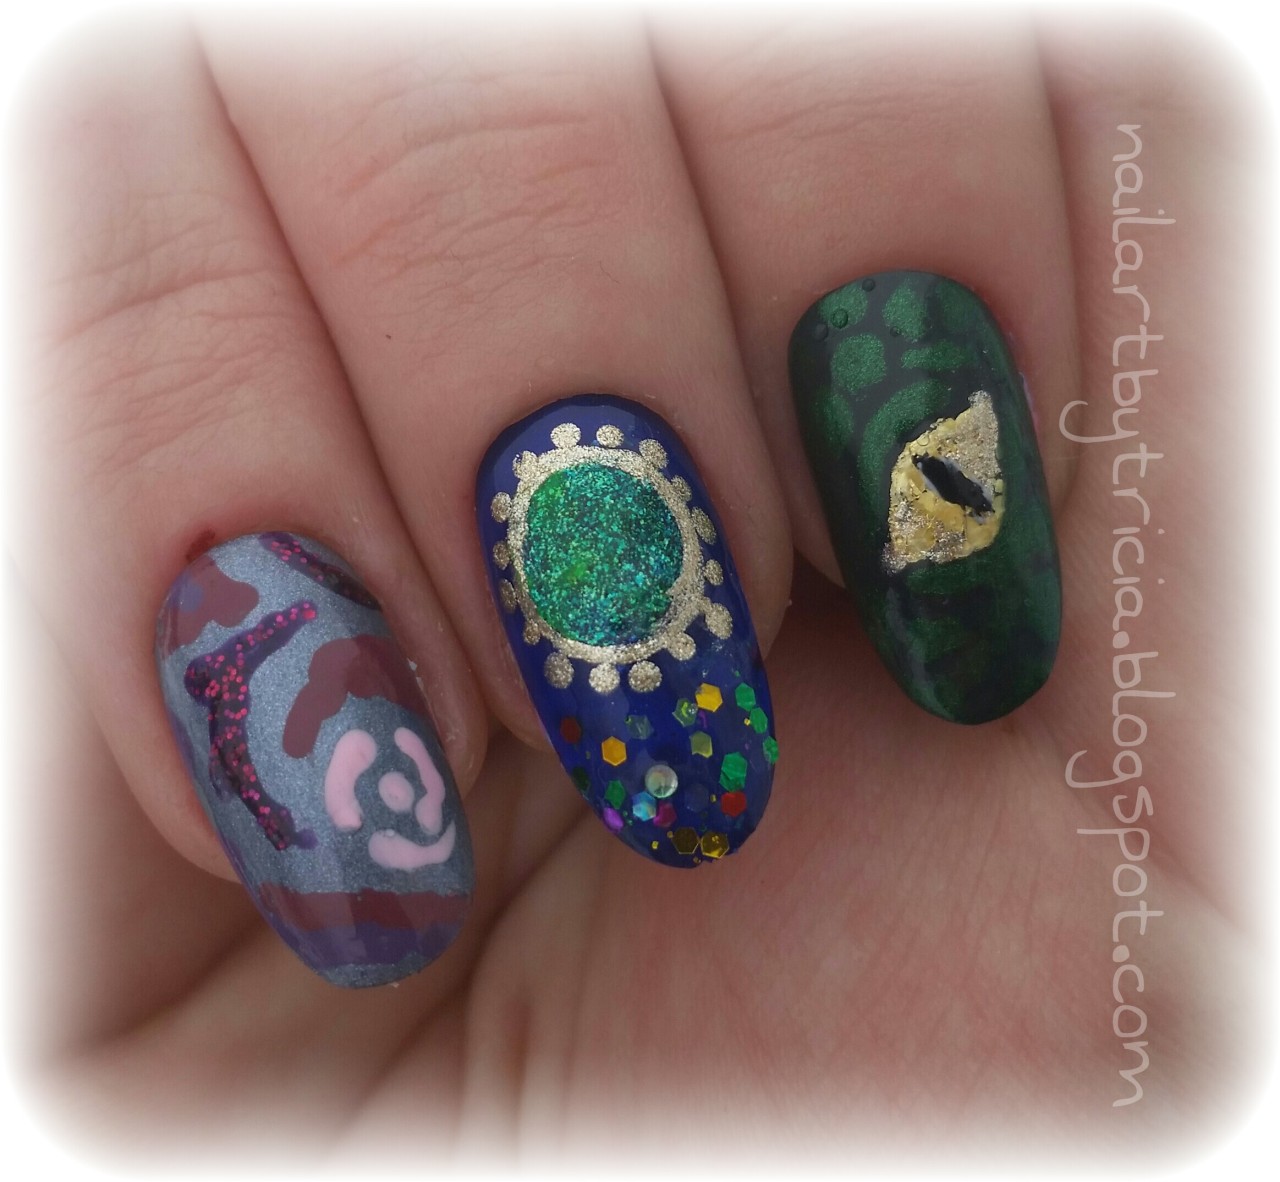
First up is my version from CND Vinylux ad - I used a no-name Sally Girl gray as my base. For the floral/abstract design, I free-handed with Zoya "Noir" along with 3 shades from The New Black's pink ombre set. This was a very easy design to do, and can be accomplished easily with multipe varieties of colors!
The Snake Eye Tutorial on page 52 was submitted to the mag from Anna Mally of Las Vegas. I used Wet N Wild "SaGreena the Teenage Witch" as my base, and another TNB green (this time from the Runway collection) for the scales. The eyes were done with "Gold Dots" nail foil, and then detailed with black and white stripers. I loved this design so much, I had to create a full design, but that is a post for another day :) The eye itself was a little challenging, but overall the design was not too terribly complicated or hard.
My last reproduction is based off the page 62 tutorial, entitled Royal Jeweled Nails with Gelish Cinderella Collection. I used Whet "Facetious" for my base, added glitter and then created a circle with "Jungle Tides" nail foil. I painted around my green circle with a gold striper, and added the tiny dots with my trusty dotting tool. Unfortunately, the green foil didn't give me the coverage I wanted/needed, so I covered it with a gorgeous sparkly "Glee" green from Jesse's Girl. Again, not too difficult - I think I just need more practice with the foils.
First up is my version from CND Vinylux ad - I used a no-name Sally Girl gray as my base. For the floral/abstract design, I free-handed with Zoya "Noir" along with 3 shades from The New Black's pink ombre set. This was a very easy design to do, and can be accomplished easily with multipe varieties of colors!
The Snake Eye Tutorial on page 52 was submitted to the mag from Anna Mally of Las Vegas. I used Wet N Wild "SaGreena the Teenage Witch" as my base, and another TNB green (this time from the Runway collection) for the scales. The eyes were done with "Gold Dots" nail foil, and then detailed with black and white stripers. I loved this design so much, I had to create a full design, but that is a post for another day :) The eye itself was a little challenging, but overall the design was not too terribly complicated or hard.
My last reproduction is based off the page 62 tutorial, entitled Royal Jeweled Nails with Gelish Cinderella Collection. I used Whet "Facetious" for my base, added glitter and then created a circle with "Jungle Tides" nail foil. I painted around my green circle with a gold striper, and added the tiny dots with my trusty dotting tool. Unfortunately, the green foil didn't give me the coverage I wanted/needed, so I covered it with a gorgeous sparkly "Glee" green from Jesse's Girl. Again, not too difficult - I think I just need more practice with the foils.
Monday, March 9, 2015
Kitty Nails for the Pet Expo
Hola! Today's nails were inspired by an impending trip to the National Pet Expo in Harrisburg, PA. This was my first time to a show like this, and I was very excited. I decided to use some of my cat decals from Bundle Monster. You get 3 large sheets of decals for $1.99 - you can't beat that!
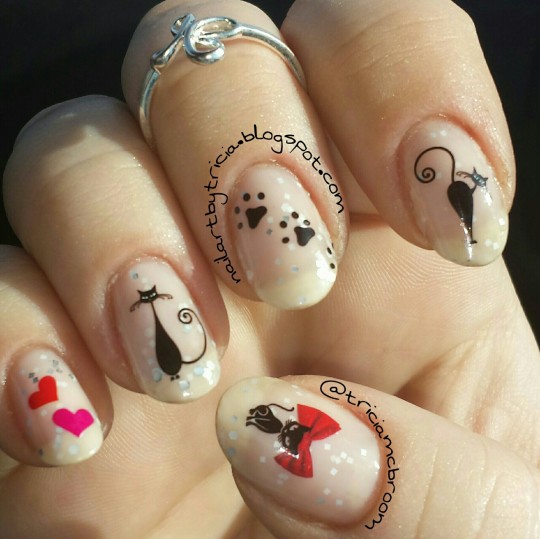 I used Orly's "Peaceful Opposition" for my base - this is a slightly translucent white, with silver and white glitters. The water decals were very easy to use - they didn't fold over on (and ruin) itself, and I didn't have a single one rip - very cool :)
The Pet Expo was pretty cool, although I was told that it was pretty slow compared to others. Whatever! I got to experience a cat show for the first time, saw some interesting snakes as well as dogs galore, watched an amazing man speak about parrots, and had a crapload of people stop us to pet the Bearded Dragon that my son brought with us. It is definitely something I recommend any animal lover try to catch; you won't be disappointed.
The Pet Expo was pretty cool, although I was told that it was pretty slow compared to others. Whatever! I got to experience a cat show for the first time, saw some interesting snakes as well as dogs galore, watched an amazing man speak about parrots, and had a crapload of people stop us to pet the Bearded Dragon that my son brought with us. It is definitely something I recommend any animal lover try to catch; you won't be disappointed.
Friday, March 6, 2015
Dear Spring, Please Come Soon!
As I sit here at my computer, I glance out the window. All I can see is snow. Almost a foot of snow. PLEASE. STOP. I feel like Winter is saying "my time is almost up, so let me s#it out a ton of the white stuff while I can!" Bad Winter. Stop now.
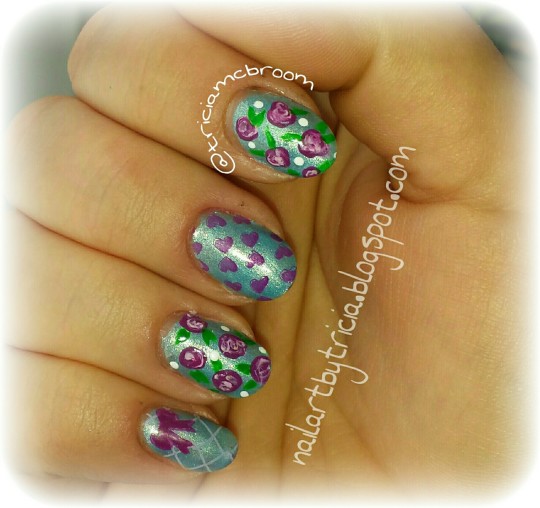 Today's mani is my beckon to spring - I love you and wish you would come back soon!
My base isi Zoya "Rebel" - this is a metallic sky blue with a subtle silver shimmer. Great coverage - which is one of the reasons I love Zoya.
I did a combo of freehand painting and stamping on this hand job. For the roses, I used a combo of WetNWild "Through the Grapevine" and one of the pinks from The New Black pink ombre kit. I used a green LA Colors striper to add the green leaves, and finally Funky Fingers "Gesso" for the white dots. I stamped the middle finger with the same WNW "Through the Grapevine" and Pueen stamp #PUEEN29. For the pinky, I did a double stamping from Gals Cosmetics plate #GA7.
Today I will be offering free ass-kickings to anyone seen doing any snow dances in my presence.
My base isi Zoya "Rebel" - this is a metallic sky blue with a subtle silver shimmer. Great coverage - which is one of the reasons I love Zoya.
I did a combo of freehand painting and stamping on this hand job. For the roses, I used a combo of WetNWild "Through the Grapevine" and one of the pinks from The New Black pink ombre kit. I used a green LA Colors striper to add the green leaves, and finally Funky Fingers "Gesso" for the white dots. I stamped the middle finger with the same WNW "Through the Grapevine" and Pueen stamp #PUEEN29. For the pinky, I did a double stamping from Gals Cosmetics plate #GA7.
Today I will be offering free ass-kickings to anyone seen doing any snow dances in my presence.
Wednesday, March 4, 2015
Petal Tips
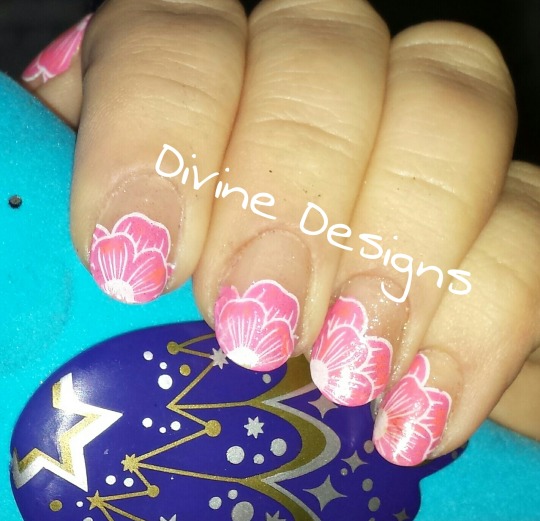
The Gelibility kit comes with two bottles - Stick It! and Fix It! You apply the Stick It" as your base/bonder. Cure. Then you mix your polish with the Fix It! in a small container or palette.( I ordered this one along with some brushes from Bundle Monster.) The instructions say to start mixing 50/50, but that you may need to adjust the amount. I did 50/50 and it worked fine for me, but I was using a sheer polish. I used Kleancolor "Sheer Pastel Nude" - I chose this color because even though you can't really see the color, it makes a nice, clean background for nail art. This way I can change my art (using non- acetone to take off the regular polish that I am using for nail art) as many times as I like while preserving the gel mani.
I created decals using Winstonia plate #W04 and Sally Hansen Insta Dri in "Fuchsia Flare" and Funky Fingers "Gesso." I decided I wanted to add another color onto the flower petals, so
I used a salmon striper to dot in some color here and there. Finally, a coat of Essie Luxe Effects "Pure Pearfection" gave the mani a slight sheen and shimmer.
I am so excited at the possibilities that Gelibility opens for me! This is definitely an impressive product! :)
Saturday, February 28, 2015
Purple Flowers
Today's mani is inspired by this post by So Nailicious.
 I used two of the purples from The New Black's "Haze" Ombre Set on this design. The negative space stripes were done using nail striping tape, and I used the watercolor technique for the flowers. I had originally placed three small white dots in the middle of the flowers, but I didn't really like how they looked, so I used the watercolor technique again to blend them into the purple and added tiny black dots. This design wasn't too difficult, and I have been getting tons of compliments all day :)
*Nails are pictured with my new awesome Pitcher Plant!
*Nails are pictured with my new awesome Pitcher Plant!
Subscribe to:
Posts (Atom)